This post may contain affiliate links.
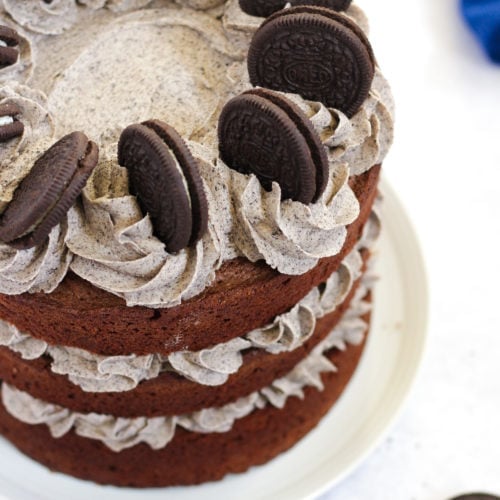
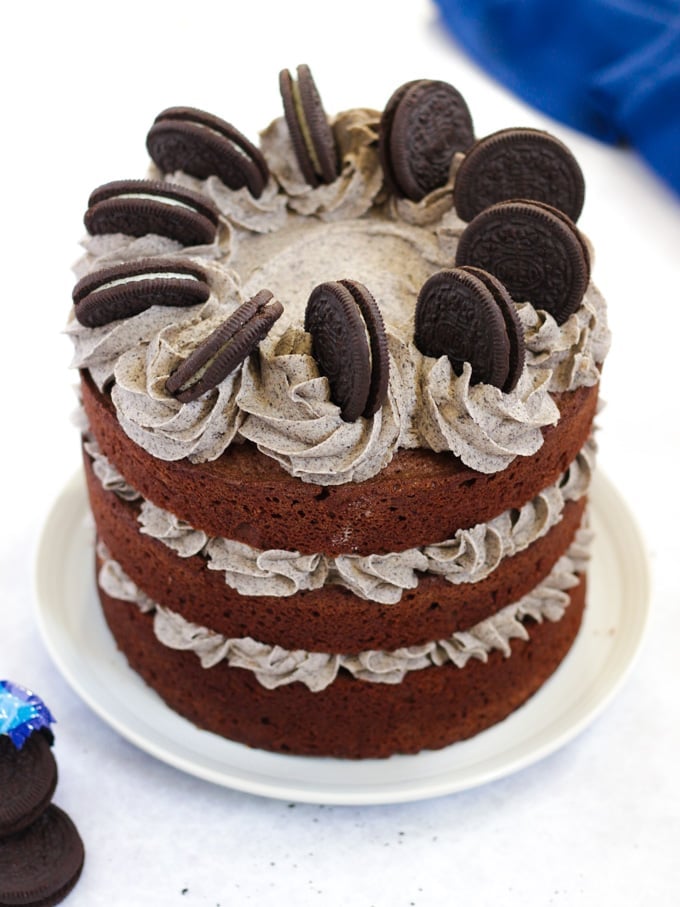
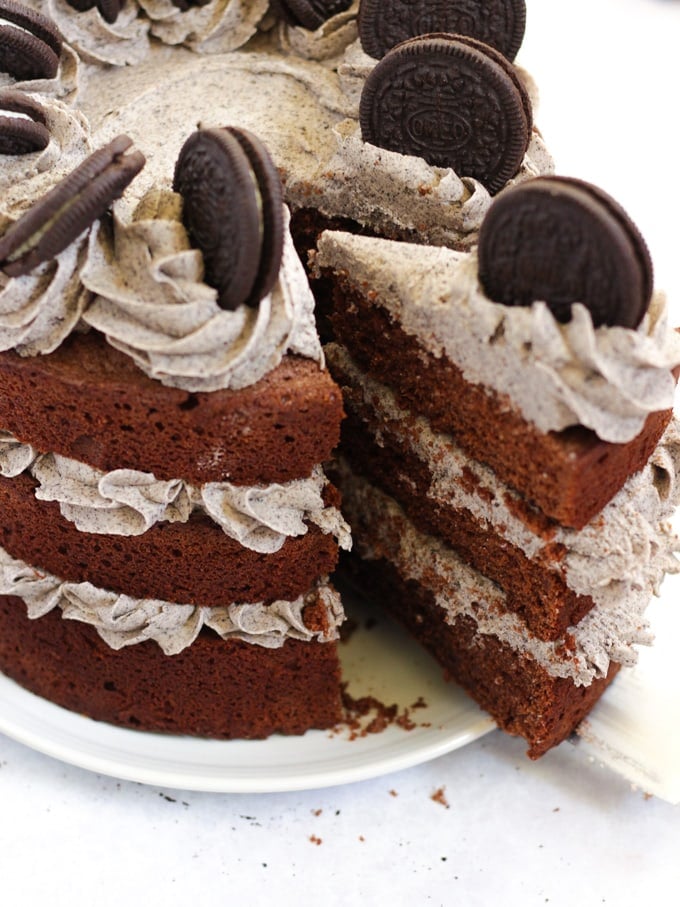
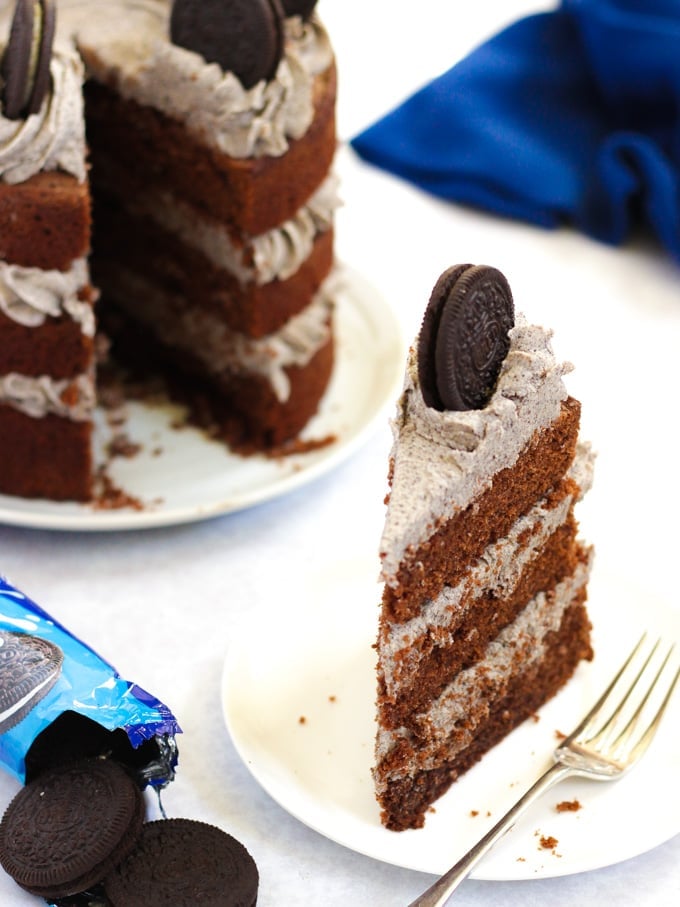
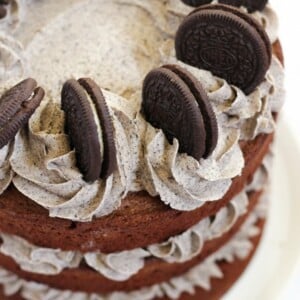
The Oreo Cake recipe is layers of moist chocolate sponge cake, sandwiched with Oreo buttercream filling, decorated with whole Oreo biscuits. This step by step cake recipe, makes a surprisingly simple show stopper of a cake!
How has it been SO long since I’ve baked a layer cake?!
Life has been so busy, I’ve been so caught up in my midweek meals and just juggling through the week, that I’ve forgotten about baking for fun. Just because.. I love it!
I was going to meet up with my lovely friend Emma a few weeks ago and I thought I’d take the opportunity to bake this Oreo Cake that’s been in my head since my Oreo Cheesecake recipe last year.
And would you look at it?! It’s a thing of beauty and here’s why:
- This layer cake a basic, easy chocolate sponge recipe, no faffing.
- Oreos crushed into the icing give that cookies and cream flavour without changing the texture of the cake.
- It’s a SHOWSTOPPER but secretly super easy – always my favourite type of dish!

HOW DO YOU MAKE A CHOCOLATE OREO CAKE?
This layer cake is surprisingly simple to make, a basic chocolate sponge cake and Oreo buttercream (or frosting as it is known in the good old USA, the home of Oreos!) topped with more buttercream and oreo biscuits.
It’s any Oreo lovers dream cake, and it makes the perfect birthday cake too.
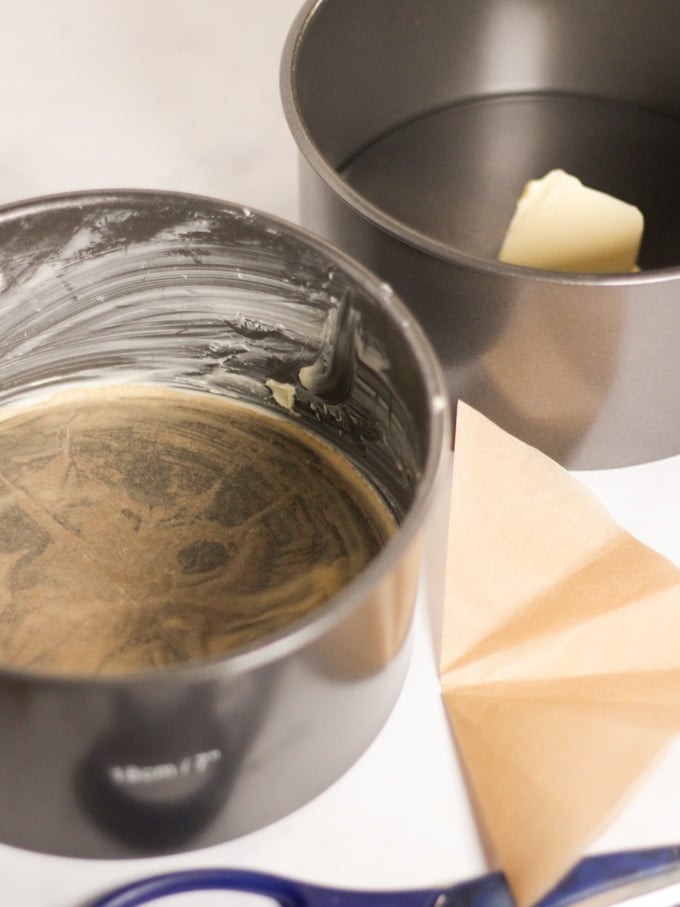
Start by preheating your oven and greasing your cake tins really well with plenty of butter, and lining the base with baking paper.
Top tip!
I cut the circles of baking paper out by folding the baking paper in half, then quarters, then eights, and snipping across a curved edge, much easier than cutting around a whole circle 3 times.
Next mix up your chocolate sponge mixture, by beating together your butter and sugar (in a mixer, with a hand mixer or by hand).
Beat in the eggs, then the flour, cocoa and melted chocolate.

Dollop the mixture evenly between the 3 tins.
Top tip!
If you don’t have enough tins, just bake one or two of the cakes at a time, then wash up the tins and repeat. The mixture will be fine sitting for a short time, but don’t leave it out, uncooked all day as it won’t rise when you come to bake it.
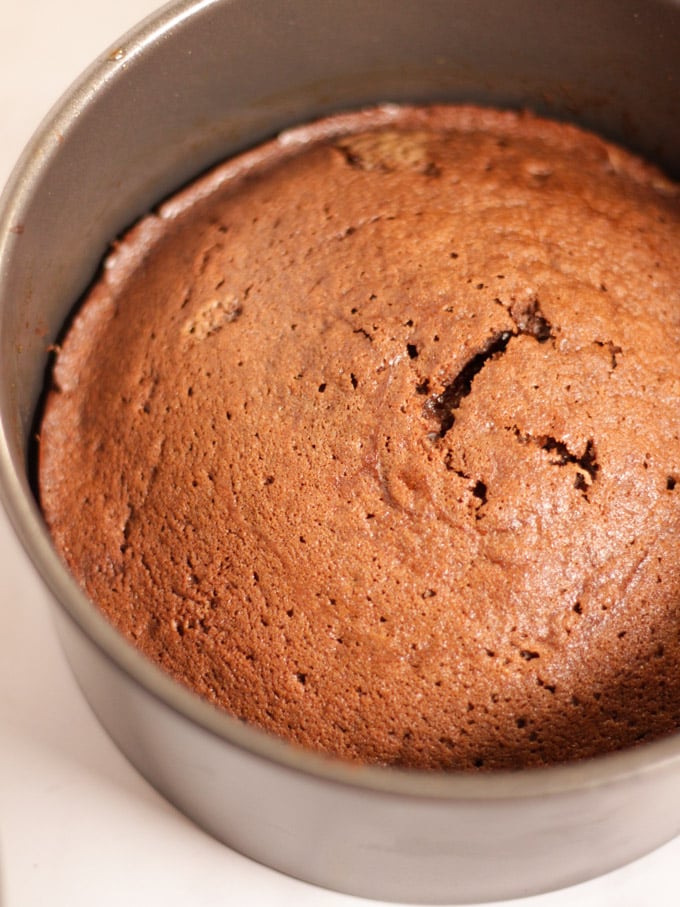
The cakes are cooked when they start to pull away from the edge of the tin (like in the photo below) and a knife poked into them comes out clean.
Allow to cool in the tin for 5 minutes and then turn out to finish cooling.
HOW DO YOU BUILD A LAYER CAKE?
This Oreo layer cake has three layers of chocolate sponge, sandwiched together using oreo flavoured butter cream.
Once you’ve baked your 3 cakes, allow them to cool completely.
If the tops of the cakes have even a slight dome shape, use a sharp bread knife to level them out. THIS IS VERY IMPORTANT! Your cake will topple over otherwise!
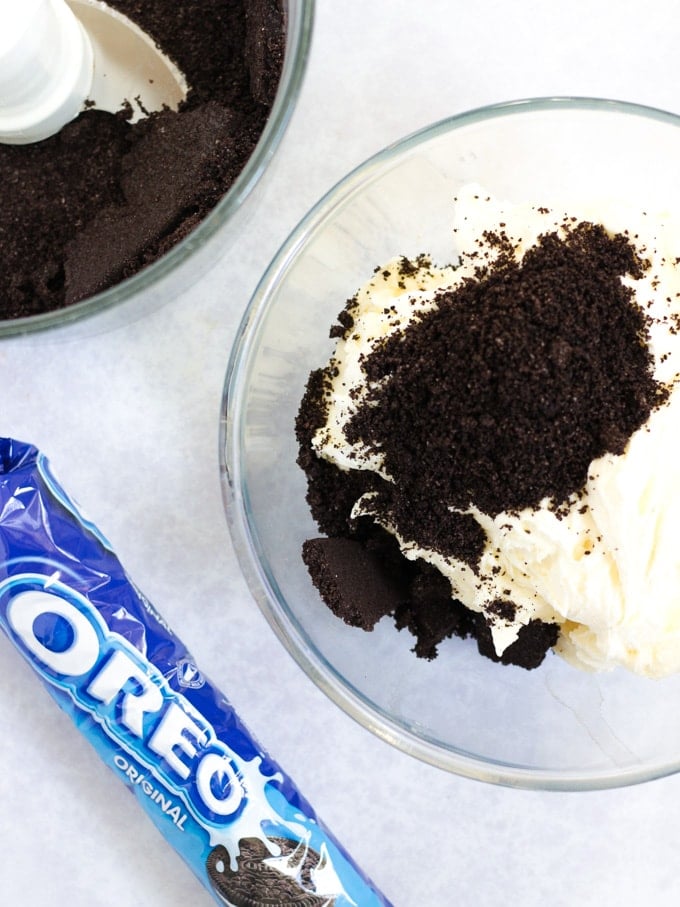
Next make your icing, but beating together your butter and icing sugar until light and fluffy.
Add in crushed Oreo cookies (I use a food processor to do this to get them really fine and I’m lazy!) You can do it by hand if you’d prefer, either in a bowl with a rolling pin or in a thick plastic sandwich bag.
Beat your crushed Oreos into the icing making sure that there’s no big lumps of cookie.
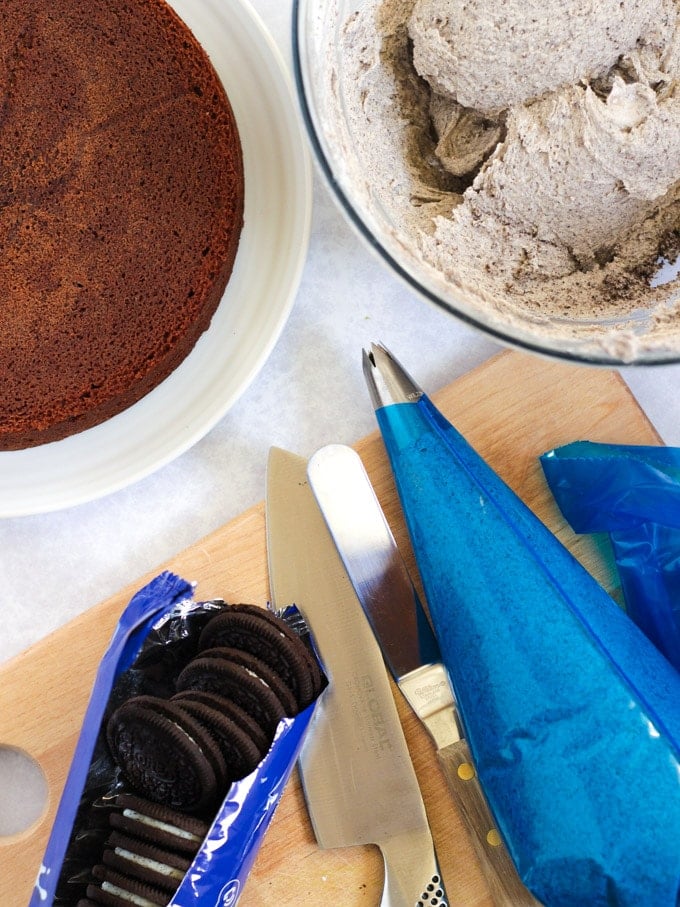
Put around a third of the buttercream mixture on the top of each of two of your chocolate layer cakes. Gently sandwich them together.
For the top layer, pipe your final third of Oreo buttercream frosting around the edge and lightly fill in the middle (This is only a guide, you simply need enough to sandwich the cakes together.)
I used a piping bag, nozzle and palette knife to do the above, but you can do it quite simple with a knife or spoon if you prefer. The piping does give it a nice touch though of course!
What I used to make this Oreo Cake:
- It really helps to use good tins for baking, I use these DEEP 7″ cake tins (I have the deep ones so I can use them for cheesecakes too!) they are a great investment.
- Disposable Piping Bags these are a must buy if you’re planning on some cake decorating, they are so easy to use. I know, these are not great for the environment. But using reusable bags takes so much detergent to get them clean, I’m honestly not sure of the best option.
- An angled palette knife is SO useful for spreading icing, it’s one of my favourite little kitchen tools.
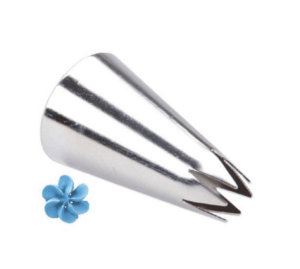
- I used this Wilton 1M piping nozzle to get the pretty swirls:
You don’t NEED any of those items to bake this cake, but they do make it easier and help to give that really special finish.
Tips for making this Oreo layer cake:
- When you add your melted chocolate to the cake, let it cool for a couple of minutes before adding.
- Be sure to take your cakes out of the oven when they are JUST cooked. They will continue to cook for a few more minutes from the heat of the cake tins. They will be dry if overcooked.
- Wait until the cakes are completely cold to trim and ice them.
- Don’t put too much buttercream inside the layers, just enough to sandwich them together. Too much will make the cake a bit wobbly.
Fancy MORE CAKES…?
- Chocolate & Raspberry Layer Cake
- Nutella Cake
- Chocolate Orange Cake Recipe
- Orange Drizzle Cake
- Caramel Rocky Road Cake
- Pumpkin Spice Loaf Cake
I hope you enjoy this recipe as much as we do. I’d love to know how you got on and what you thought of it. Please rate the recipe and leave me a comment below if you do.
If you enjoyed this recipe, subscribe to my newsletter for weekly meal plans, and follow me on Facebook, Instagram and Pinterest for lots of chat, recipes and life updates!
HOW TO MAKE THIS OREO CAKE recipe :
Oreo Cake
Ingredients
For the cake:
- 350 g (12 oz) Butter
- 350 g (1 & 1/2 cups) Sugar
- 6 Eggs
- 30 g (1 oz) Cocoa, Please see recipe notes
- 270 g (1 & 3/4 cups) Self raising flour
- 100 g (3.5 oz) Dark chocolate
For the Butter cream:
- 300 g (10.5 oz) Butter
- 600 g (4 cups) Icing Sugar
- 154 g (5.4 oz) Oreos, 1 pack
For Decoration:
- 154 g (5.4 oz) Oreos, 1 pack
Instructions
- Preheat oven to 180c/350F.
- Grease 3 x 7" round sandwich tins and line the bottom with baking paper.
- Cream your room temperature butter with your sugar until it’s pale, light and fluffy.
- Beat in the eggs, one at a time, wiping down the sides of the bowl as you go and ensuring everything is well mixed. (It might start to look a little curdled, don't worry!)
- After this, mix in your flour and cocoa. If you’ve been using a mixer, do this bit by hand. It helps to keep the sponge light.
- Stir in the melted and slightly cooled chocolate.
- Spoon into your tins, smooth out with the back of a spoon. Make a bit of a dip in the middle to account for rising
- Bake for about 30 minutes or until a skewer comes out clean. You might need to adjust the time by 5 minutes either way depending on your oven.
- Meanwhile make your icing. Beat your butter until it’s pale, light and fluffy.
- Use a food processor to blizz one pack of your Oreos to a fine dust.
- Beat in your icing sugar, once you are happy with the consistency fold in the crumbled Oreos.
- When your cakes are completely cold, use a carving knife to level them. Just trim the top crust off. Remember, this is important, it’s not a waste of cake. If you don’t do this, with a cake this size it will be wonky.
- Top each layer with a spread of your oreo buttercream.
- Pipe a circle around the outside of two of the layers, sit each on the one before.
- On the top layer, pipe small dollops all over, and top with your whole Oreo biscuits.
- Enjoy!
Did you make this recipe? Click here to let us know how it went and give it a ⭐️ rating! Your feedback helps us to make more recipes you really want.
Notes
- I always use really good quality Green & Black Cocoa. This means that you can use less cocoa for a deeper taste. If you're using a less intense cocoa, you may want to add a little more, say 50g/1.5oz. However, I do think that the texture of the cake isn't quite as good then.
Nutrition
Nutrition information is automatically calculated, so should only be used as an approximation. Nutritional values are per portion unless otherwise stated.
This post was originally published on April 2, 2019 and updated later to make improvements.


Good looking cake. The recipe is simple enough but its very hard work if you don’t have a stand mixer.
Do you add just the biscuit bit of the oreos to the buttercream or the whole things? Hard to crush them when the cream in the centre is still there….
If I were to make this in a loaf tin(serving 8), how long do I bake for?
Thank you
Hi, do you think I could freeze this Oreo cake?
Many thanks
Hi I just wanted to know if you think this recipe would work if I swapped the oreos for party rings?