This post may contain affiliate links.
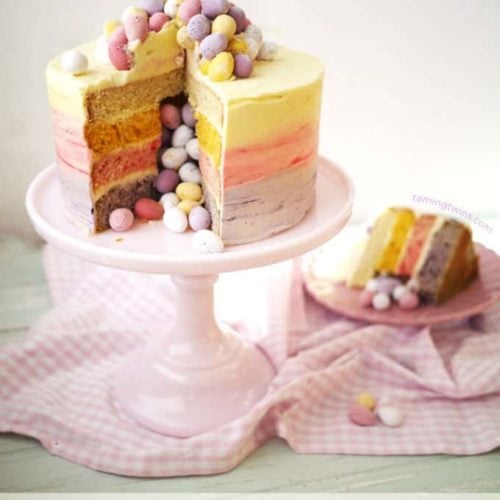
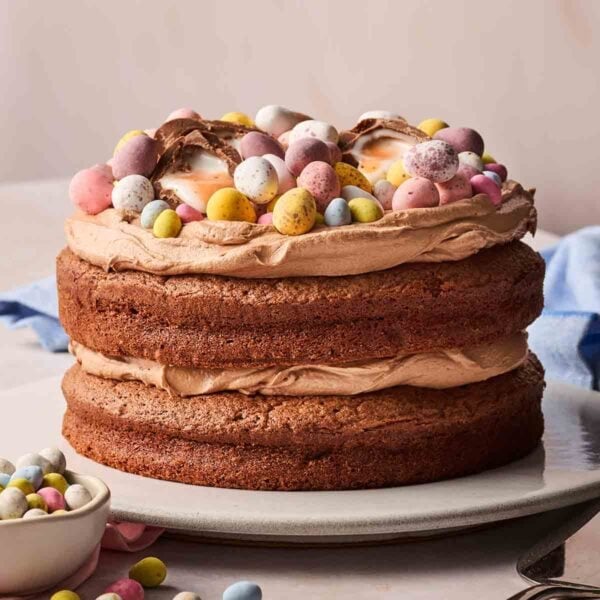
This colourful Mini Egg Cake is a wonderful Easter celebration treat. It’s packed with surprise Cadbury’s Mini Eggs in a fun piñata style for the wow factor, and is really easy to make.
If you’re a lover of giant cakes (who isn’t?!), have a go at this exuberant Mini Egg Cake.
It has a perfect pop of sugary spring colour and a few surprises inside (where our piñata inspiration comes in), making it an ideal showstopper for Easter celebrations.
It might be a whopper BUT it’s surprisingly simple to make. Just follow the tips and tricks below.
Why you’ll love this Mini Egg Cake recipe
⭐️A larger-than-life impressive celebration cake
⭐️ Fun, colourful and easy
⭐️ Delicious cake with extra treats inside
How to get the Mini Eggs inside the cake
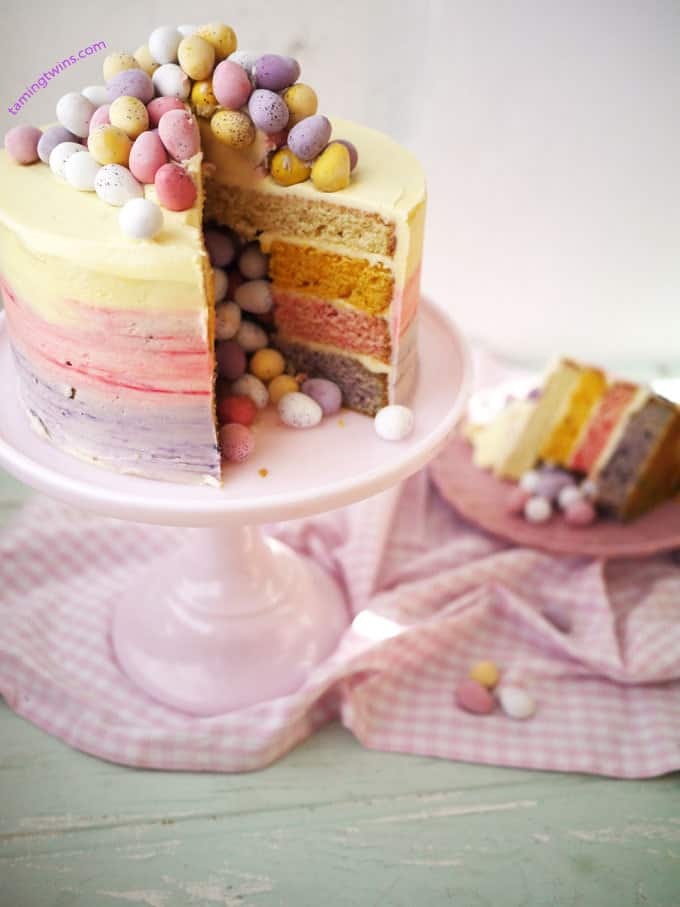
To get that hole where the surprise Mini Eggs live, which will be unveiled when you slice into the Easter Cake, you simply need to cut a small hole in the centre of the cake.
You can do this either after you have sandwiched the three bottom layers together, or one at a time before you stack them (just make sure the holes line up!)
Then fill the hole with Mini Eggs until they’re level with the top. Make sure you leave the top layer intact so this acts as a ‘lid’ for the hole.
Mini Egg Cake Ingredients
- Butter – I use unsalted, room temperature butter
- Caster sugar – Be sure to use caster sugar, not granulated. It melts and reacts differently as the grains are larger
- Eggs – Free-range and medium or large sized is best
- Self raising flour – This flour contains a raising agent so there’s no need for baking powder too
- Vanilla extract – It’s important NOT to use vanilla essence instead. This is more synthetic and doesn’t taste as good
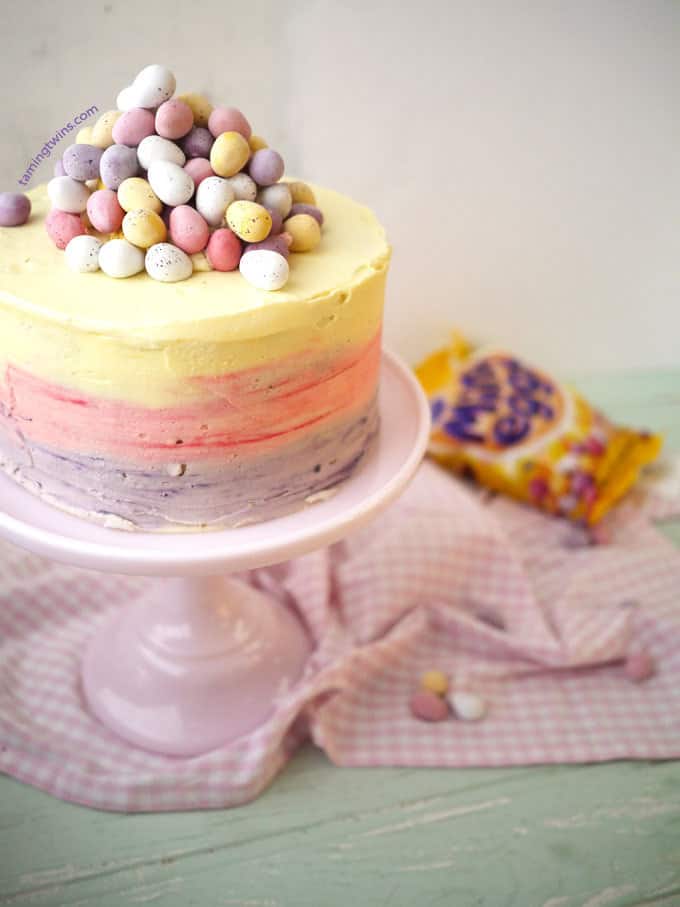
- Colouring – This gives the ombre, spring-coloured effect in the frosting. Always use paste/gel colours to colour the cake and the icing (I use Sugarflair in Egg Yellow, Ruby and Grape Violet)
- Piñata filling – Cadbury’s Mini Eggs
Storing
Try and ice and fill this Easter Cake the day you plan to serve it. It’s not essential but the Mini Eggs inside will get a little soft if left any later.
If there’s any leftover, keep it in an airtight container at room temperature for up to 3 days or up to a week in the fridge.
It may go a little hard in the fridge so try to serve at room temperature.
Top Tips!
➡️ When adding the colours to the cake batters and icings, do so a tiny bit at a time and add more if you need to until you get the colour you’re looking for.
➡️ I like to not quite fully mix the colours in to give a ‘speckled’ effect to both the sponge and the icing.
➡️ It’s easier to ice using a turntable, but if you don’t have one don’t worry. Just put the cake on greaseproof paper on a flat surface and use the paper to help you turn the cake. If you put the cake on a plate, it’s very hard to smooth the sides as the lip of the plate gets in the way.
➡️ It really helps to use good tins for baking. I use and recommend something like these as they are a great investment: Masterclass 7″ Deep Round Tin.
➡️ Always trim the cake tops to make them flat. Never try to stack a domed cake, it’s asking for trouble! Don’t trim and ice the cakes until they are completely cold.
➡️ The two things that will improve the look of your cakes the most are these little beauties; an angled palette knife and a cake side scraper. Honestly, they make SUCH a difference!
More Impressive Easter bakes…
Easter Ideas
Easter Chocolate Cake

Sweet Things
Chocolate Easter Bark {with Maltesers Bunnies}
Sweet Things
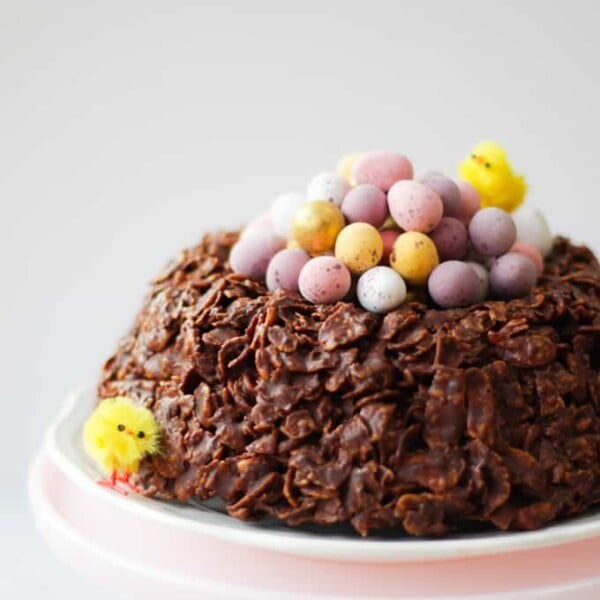
Chocolate Easter Nest Cornflake Cake Recipe
Easter Ideas
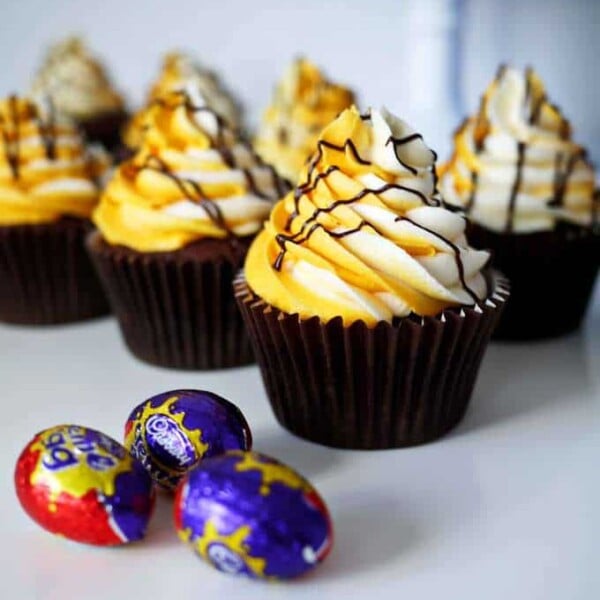
The BEST Creme Egg Cupcakes
FAQs
It’s important to trim the crusts off to make sure your cake is level. A cake of this size will obviously be wonky if you don’t. Don’t see it as a waste of cake (because the offcuts are still edible!)
Push a skewer or sharp, thin knife into the centre of the cake. If it comes out clean, it means it’s cooked.
It’s not crucial but it will be so much easier to make if you have a stand mixer or handheld one, so do use it if you own one.
This should ideally be unsalted. Also, use your butter at room temperature, or if it has come straight from the fridge, microwave for a few seconds until slightly softened.
Let me know how you got on and what you thought of these recipes. Please rate the recipe using the ⭐️ below.
Also I’d LOVE to see your cooking creations. If you’d like to share yours with me, you can tag me on Instagram (@tamingtwins).

Piñata Mini Egg Cake
Ingredients
- 500 g (1.1 lb) Unsalted butter
- 500 g (2 & 1/3 cups) Caster sugar
- 8 Eggs, Medium, free range
- 500 g (3 & 1/2 cups) Self-raising flour
- 2 tsp Vanilla extract
For the icing:
- 500 g (1.1 lb) Unsalted butter
- 750 g (5 cups) Icing sugar
- 2 tsp Vanilla extract
- Sugarflair gel paste food colouring , See notes
- 328 g (12 oz) Cadbury's Mini Eggs
Instructions
- Preheat oven to 180℃/350F fan, 200℃/400F or Gas Mark 6.
- Cream the butter and sugar until light and fluffy.
- Beat in the eggs until well combined (don't worry if it looks a bit odd, it'll be fine in a moment).
- Gently stir in the flour and vanilla. If you’re using a mixer, do this slowly or by hand.
- Split the mixture into 4 bowls (about 500g/1lb in each).
- Leave one plain and colour the others with a tiny tiny bit each of Egg Yellow, Ruby and Grape Violet until they are each a pastel shade.
- Prepare 4 (or 2 at a time if you only have 2) 7″ tins. Oil them and line the bottom with baking parchment.
- Spoon each of the mixtures into a tin and bake for about 25 minutes or until just cooked and a skewer comes out clean.
- If you’ve only baked 2 of the sponges, wash them out, prepare them again and bake the remaining 2 lots of batter.
- When the cakes come out of the oven, leave to cool in the tin for 5 minutes and then turn out onto a wire rack.
- Meanwhile, make the icing. Beat the butter until very light, pale and fluffy (about 5 minutes in a mixer or 10 by hand).
- Beat in the icing sugar until total combined and fluffy. Stir in the vanilla.
- If the icing is a little stiff, add a few drops at a time of boiling water and beat in until fluffy and ‘floppy’.
- Now to colour the icing: Spoon out 2 lots, each of 200g/7oz of icing, into separate bowls. Colour these Egg Yellow, Ruby (pink) and Grape Violet (lilac) using a knife tip of gel colour.
- Level the cakes and then use the remaining, uncoloured icing to sandwich the cakes. Cut out the centre core, leaving the top layer intact. Fill with Mini Eggs.
- Use the coloured icing to cover the cake with an ombre, graduated colour effect.
- Dollop any remaining icing on top to ‘glue’ a small mountain of Mini Eggs on.
Did you make this recipe? Click here to let us know how it went and give it a ⭐️ rating! Your feedback helps us to make more recipes you really want.
Notes
Nutrition
Nutrition information is automatically calculated, so should only be used as an approximation. Nutritional values are per portion unless otherwise stated.
This post was originally published on March 23, 2015 and updated later to make improvements.


Hello Sarah been admiring your recipes and looking forward to giving some ago! With this cake my friend wants me to make her one for her daughters birthday on Sunday, I want to make it today as she’s picking up tomorrow lunch time. Will the mini eggs be okay in that time? I don’t want them to loose there colour or anythingm I’m guessing I just keep it in my cake box till I transfer it to the cardboard cake box to give to her xx
Beautiful looking cake. Is the temperature
Set for a fan oven or should that be 160C?
Thank you
Will these quantities work with 3 x 8” tins.? Also can you please add the oven temp .?
Have added the temperature – sorry! You may have too much for 3 larger tins, the cakes would be very thin. If you only have 8″ tins I would probably try making two and cooking them for a little longer. Hope it goes well!
Nossa! Diferente porem bonito. Valeu a recita, vou tentar fazer um assim, espero que fique na mesma qualidade.
The ombre colors are so pretty, and I love how the Cadbury eggs just spill out of the middle. Very nice, I’ll have to try this for next spring!
Beautiful looking cake! I’m not seeing a temperature to bake at though, and I’m in the middle of making it! 🙂
This happened to me also! I cooked them at Gas Mark 4 (177C/350F) for 25-30 mins and they came out perfectly xxx