This post may contain affiliate links.
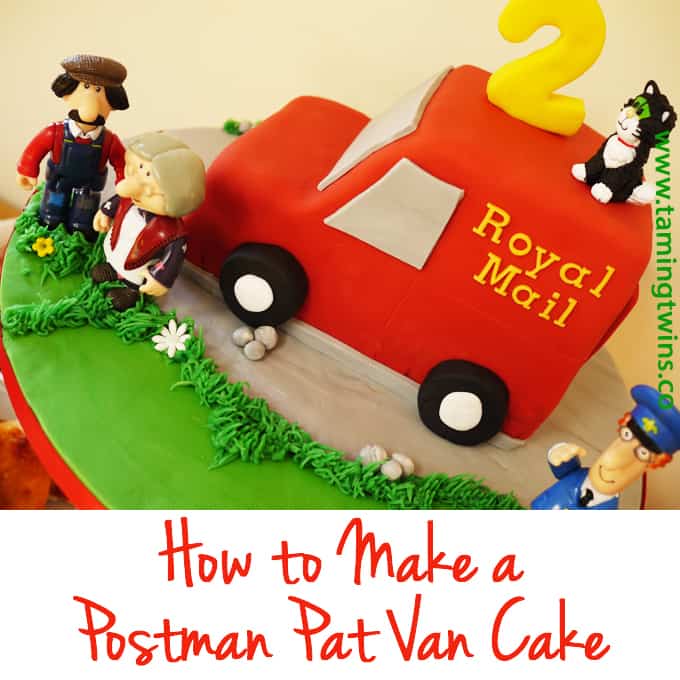
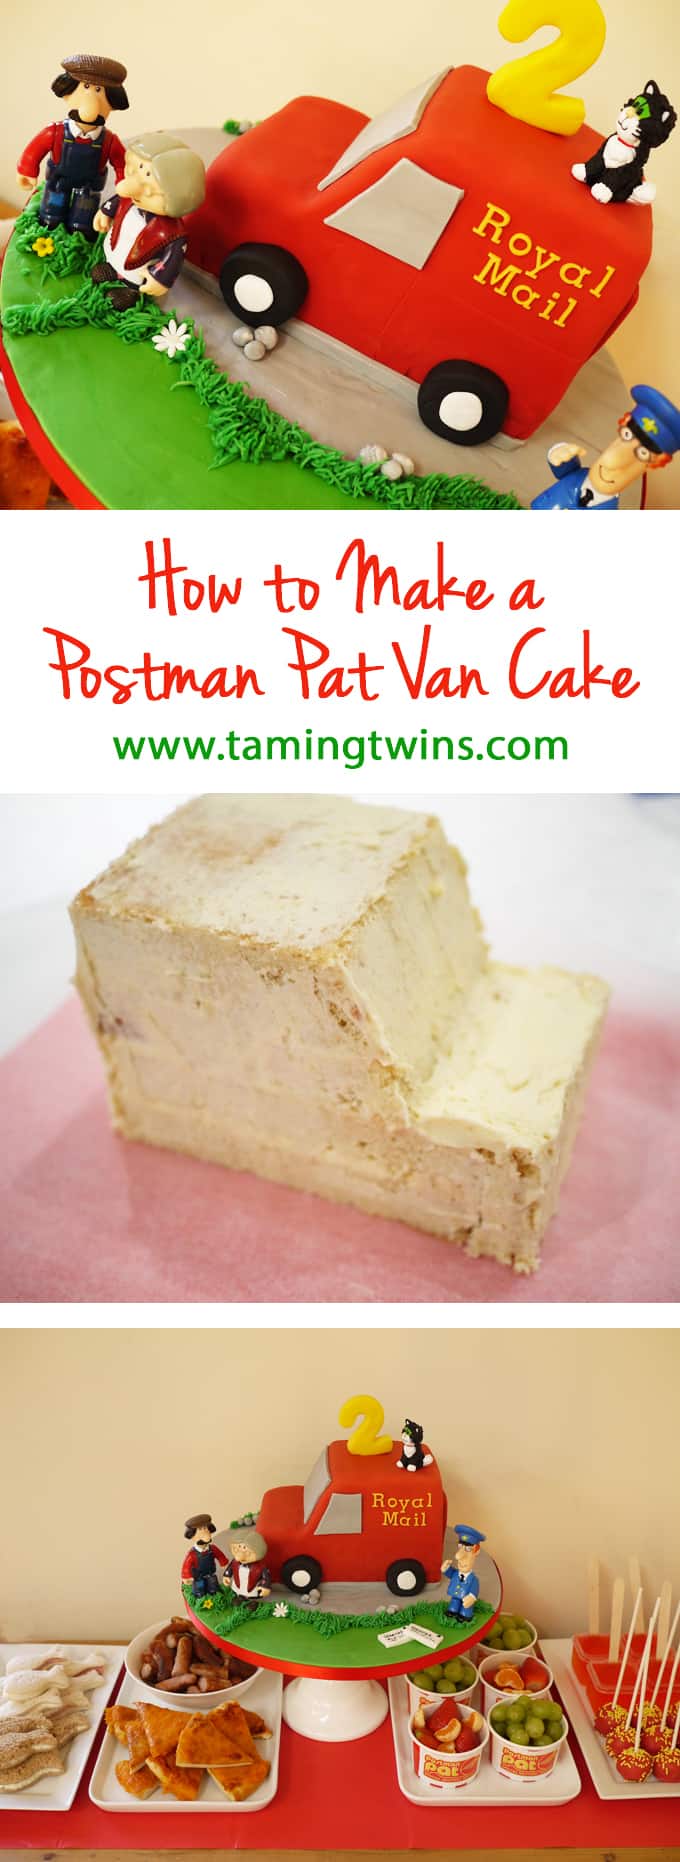
Parents of Postman Pat loving toddlers.. Here it is! My step by step Postman Pat Van Cake tutorial.
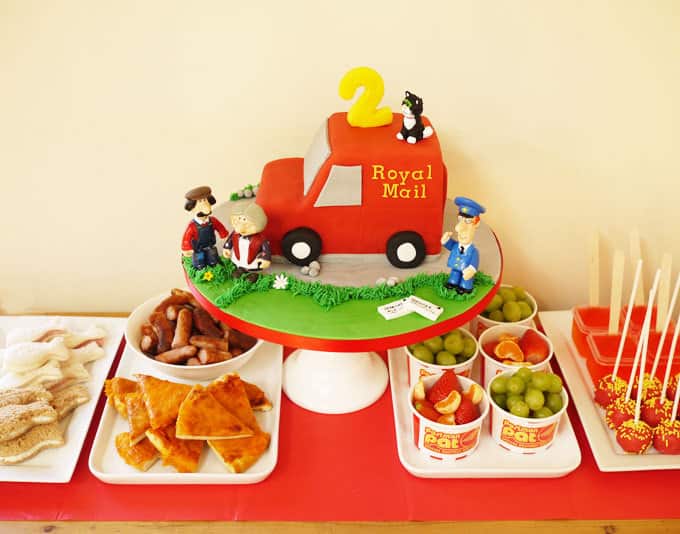
A couple of years ago (arrghh, how are my babies possibly nearly FOUR?) I wrote about their Postman Pat themed second birthday party. True to form, I went a bit crazy over the food with a Postman Pat styled buffet. (Special Delivery Services jelly anyone?) But the most questions and comments from that post were about the Postman Pat van cake. I am now finally getting around to writing this up.
I hope if you’re a parent of a toddler, and looking for birthday cake inspiration this is useful! (Apologies for the rubbish photos, this was made such a long time ago now.)
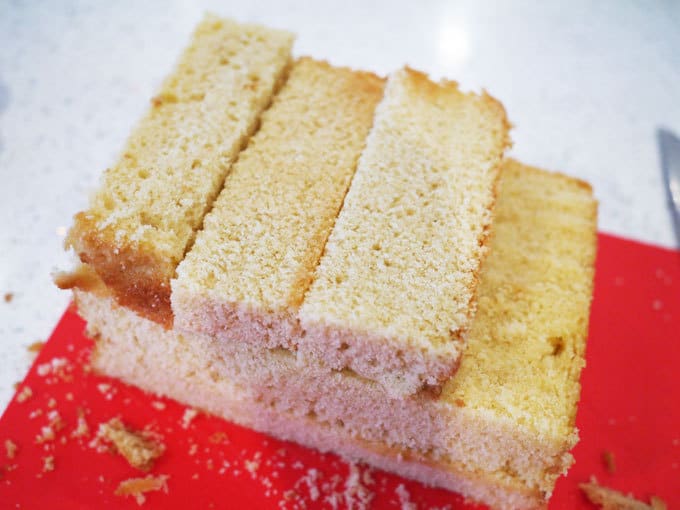
1. Start by baking 3 shallow, square sponges (in a brownie pan or similar). I used a standard basic sponge recipe (equal weight of eggs, butter, caster sugar and self raising flour). Obviously the number of portions you want will decide how big you need to bake your cakes.
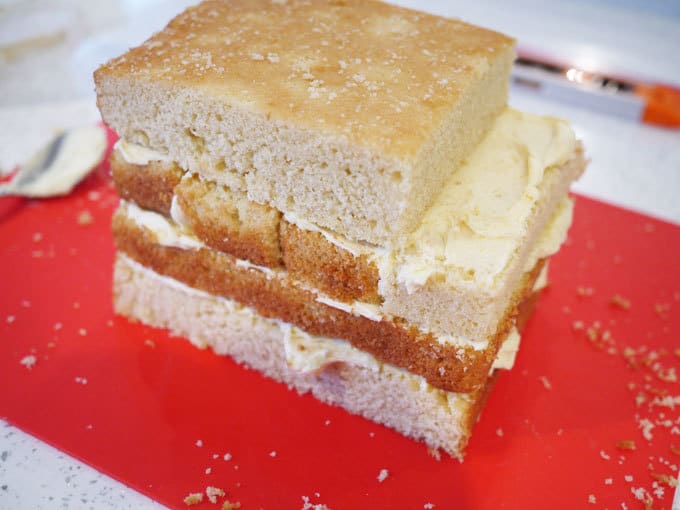
2. Using a very sharp bread knife, carefully trim the upper and lower crusts off of each cake and cut it into slabs and fingers of cake to build up the shape. I used 2 rectangles on the bottom, topped by a layer of 4 offcut fingers of cake topped by another rectangle. This will depend on the size of cake you’ve baked of course and mine took some jiggling around until I got the dimensions that looked right with the cake I had.
The floor to the top of the bonnet and then the top of the bonnet to the roof should be about the same height though (so two layers of cake each in my case).
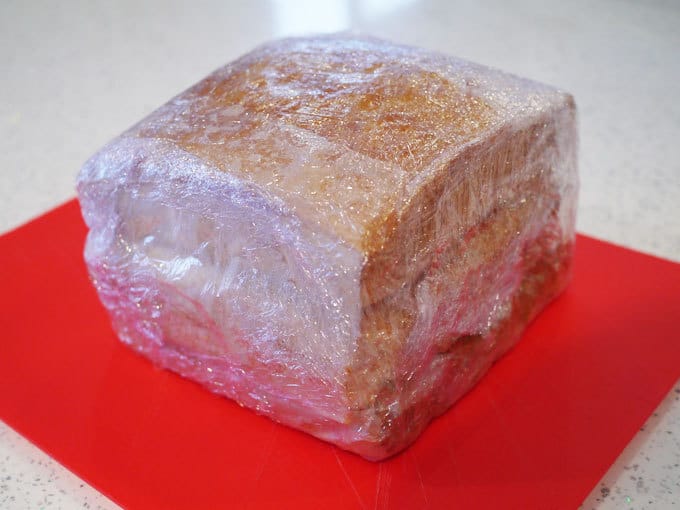
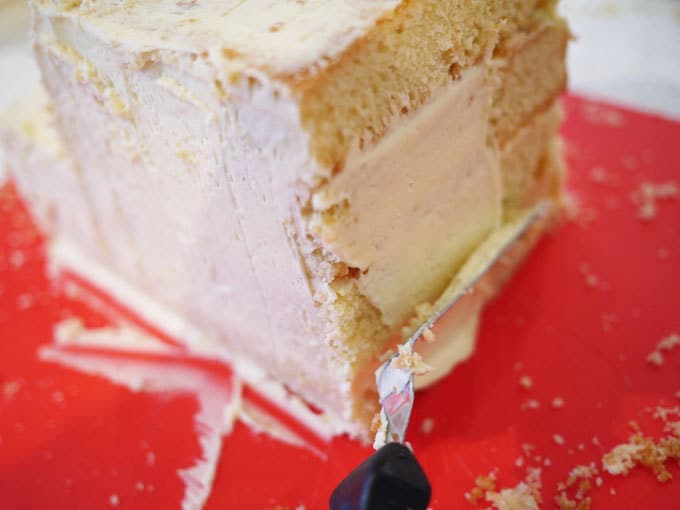
3. Test out the construction before sandwiching it all together with soft buttercream (a 1:1 ratio of unsalted butter to icing sugar). Then, using your sharp bread knife carve down the sloping windscreen. Be careful to take just a little off at a time until you get the angle that looks right.
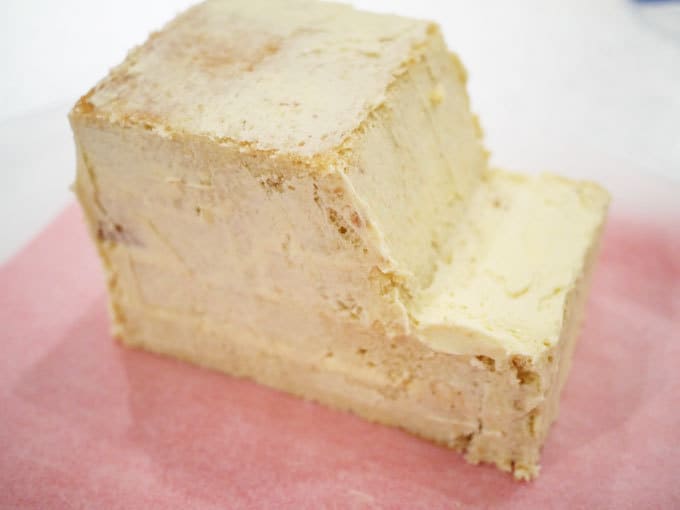
4. Then use more buttercream icing to cover the whole thing with a very thin coating, filling any gaps and wholes and smoothing it all off. Put as little buttercream on as possible, not a thick layer, just enough to smooth it all like polyfilla. Try to keep the corners sharp. Chill the cake for about an hour at this stage.
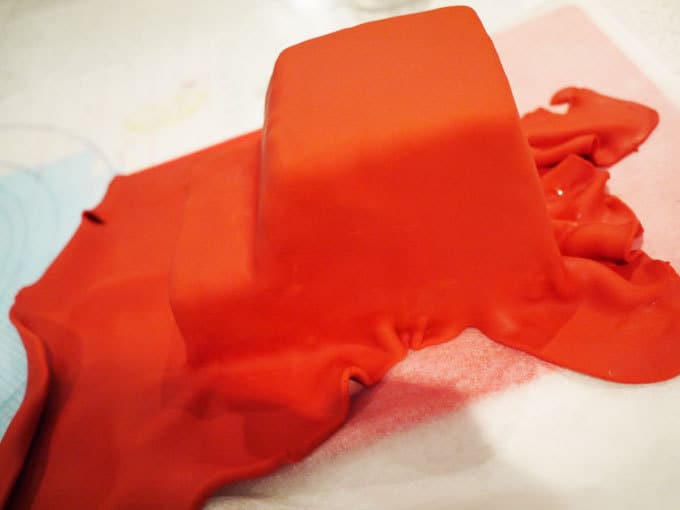
5. Next, brush the cake with a pastry brush and a little water. Then knead and then roll out your red sugarpaste icing. I used ready coloured which doesn’t have a great consistency but is so much easier than trying to colour your own sugarpaste red.
Carefully lift the sugarpaste (using your rolling pin to support it) and drape it over the cake. Starting from the roof of the van, smooth it out, working out any air bubbles and gradually working your way down to the bottom of the cake. Use the flat edge of your hand (or even better, a cake smoother – Cake Decorating Smoother Polisher Tool).
6. (Sorry my photos go awol after this, I think it was late at night!) I used half green sugarpaste and half grey to cover a round cake board, to look like grass and road. I then placed the cake on top. I added mini grey rocks and piped buttercream green grass.
I used plastic shop bought figures (this set were just the right size – Postman Pat – Set of 5 Figures.
Finishing touches…
- I added some mini flowers to the grass.
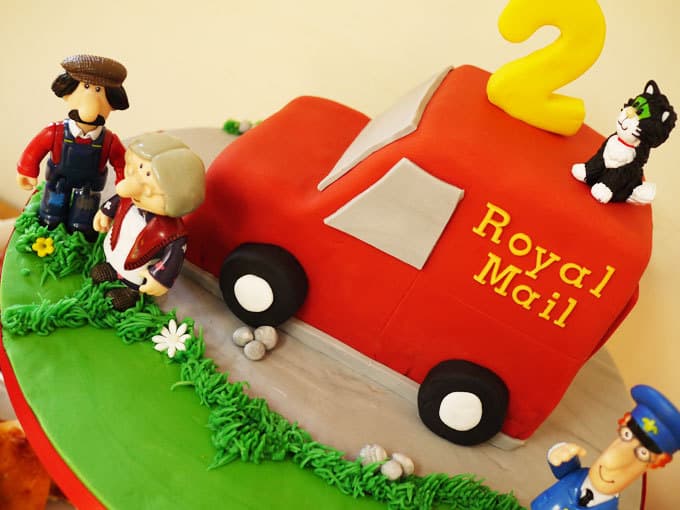
- I made black tyres with white circles stuck on from sugarpaste.
- I made grey windows and windscreen from grey sugarpaste.
- I used these cutters: Alphabet Tappit Cutters Lower Case
- The 2 number was very thick sugarpaste cut out, with a skewer in the middle and left to dry overnight before putting into the cake.
- There was also a grey strip around the bottom of the van to make it neater.
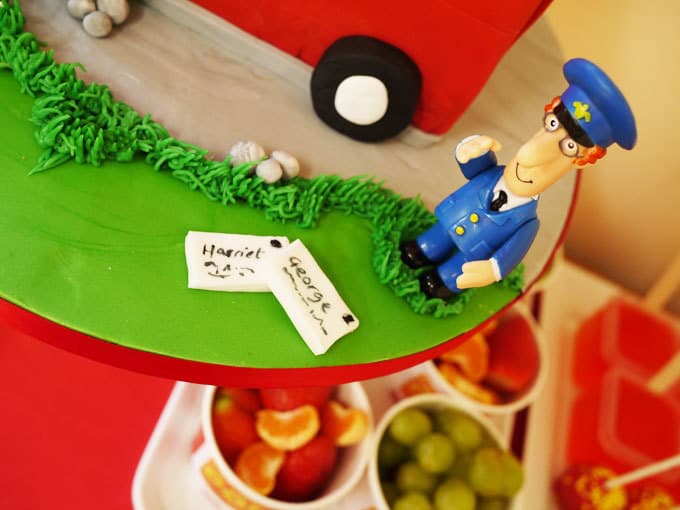
- I made a number plate and little personalised letter from white sugarpaste and wrote on them with a little food colouring and a fine paintbrush.
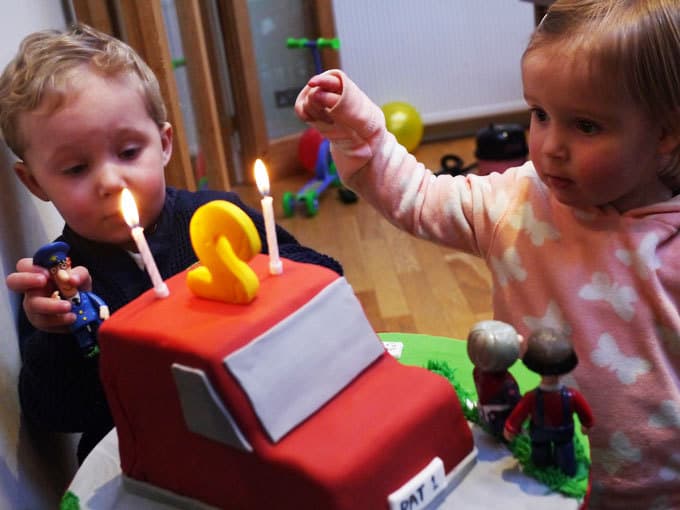
I’ve never really made any character cakes before (don’t look at that back view!) but they loved it (despite their slightly dazed faces in this photo bless them).
It really wasn’t too hard once I’d mastered the shape and I was super happy with it. Now they just need to have a van cake every year…
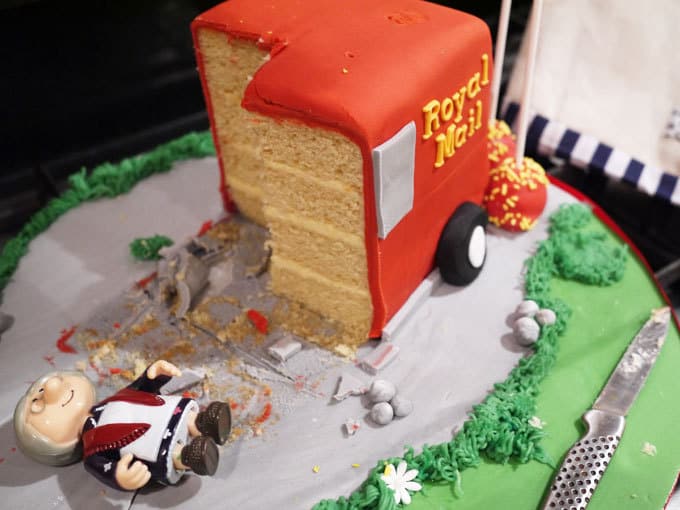
(Poor old Mrs Goggins. It was a long day!)
You can see their third birthday cake along with how I made it in the video below..
https://www.youtube.com/watch?v=3bIc45XaA4A
Bits and bobs I used…
Pin it for later..
Disclaimer: This posts contains affiliate links.
Keep in touch on Facebook ¦
Chit chat on Twitter ¦
Never miss a trick on Bloglovin’ ¦
Circle with me on Google+ ¦
Pinning like my life depends on it Pinterest ¦
This post was originally published on September 16, 2015 and updated later to make improvements.






I just wanted to thank you for this post! I’ve just made my own version for my son’s 2nd birthday tomorrow and couldn’t have done it/wouldn’t have even attempted it without this blog. If I could attach a picture I would do.