This post may contain affiliate links.
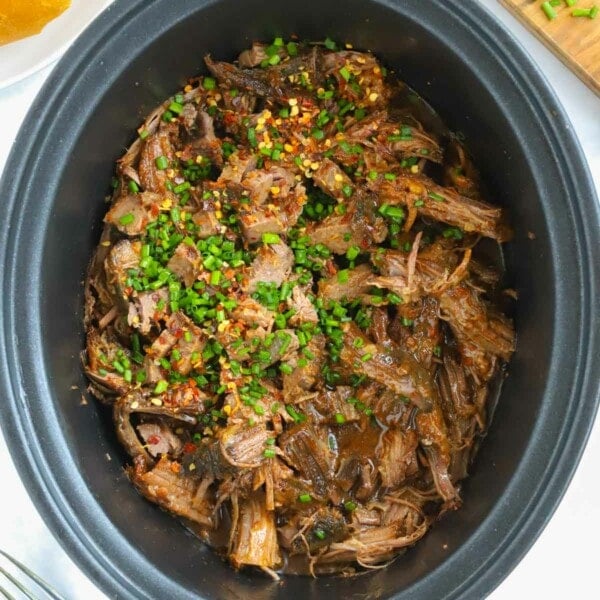
We’re really throwing it back here now for those of you who might have LIVED by the king of late-night takeaways – the humble doner. And even if you didn’t, you’re going to love this one for a cheeky weekend fakeaway that manages to be simple, low cost and healthy. Treat your family and friends with this Homemade Doner Kebab.
After a lot of testing and tasting, it turns out that yes, a Homemade Doner Kebab can be easy AND healthy, made in a slow cooker!
Whether you’re serving this for a crowd to pile in their own fillings or a family Friday takeaway, I hope you love it as much as we do.
If you want side dishes for this meal, my Easy Greek Salad would go really well, and you could even make your own Easy Flatbreads with Garlic Butter. You could always make some homemade potato wedges for a bigger meal too.
Why you’ll love this Doner Kebab recipe
⭐️ Feels like a big treat
⭐️ Low cost and full of flavour
⭐️ Ideal for serving to guests
About the Doner Kebab
The doner kebab originated in Turkey centuries ago, and it’s thought it arrived in London in its current form (meat and veg inside bread) around the 1960s. I love this Guardian report which talks about the origins of the humble doner, and how it’s so much more than just a post-pub indulgence.
This is my simple, homemade version with inspiration taken from the one we know and hold dear. I’ve kept it as family friendly as possible with budget, nutrition and convenience in mind.
You can also make this in the oven and details are in the FAQs below.
Homemade Doner Kebab Ingredients
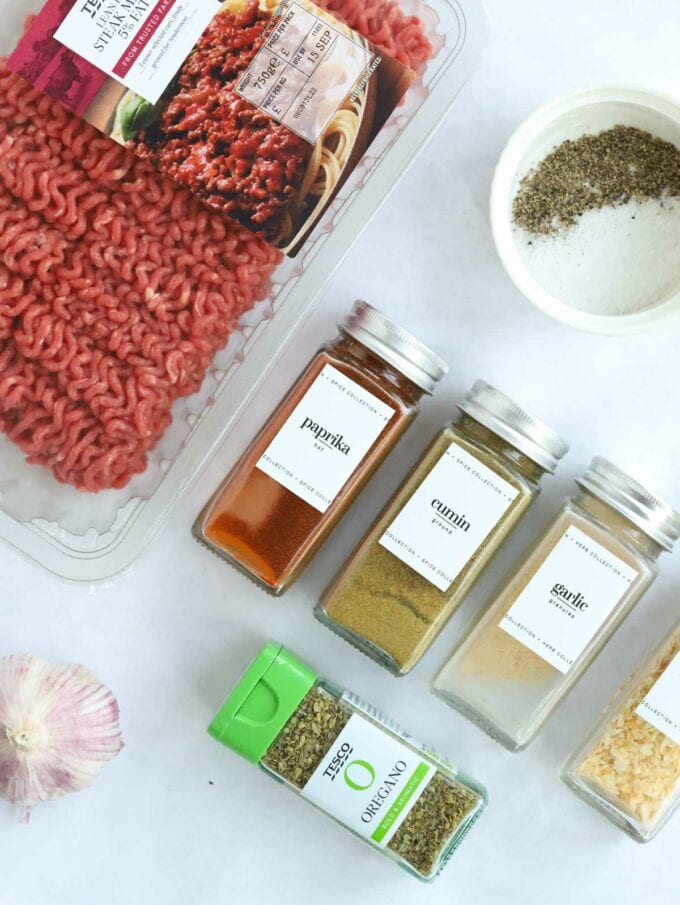
- Lean mince – you can use beef or lamb here. Whichever is your preference. I find 10% fat works very well, and 5% is also fine but can be quite dry, so be sure to pour over plenty of the cooking liquid if you use this low-fat mince.
- Onion powder – or onion granules.
- Garlic granules – or garlic powder.
- Ground cumin
- Paprika
- Dried oregano
- Garlic – we cleverly roast off a whole bulb here to make the classic garlic sauce but even better!
For the sauce: - Mayo – use whichever type you prefer.
- Greek yoghurt – you can use natural yoghurt here but the sauce will be slightly more runny (which is fine).
- Mint sauce – the vinegary type, not mint jelly.
How to make a Homemade Doner Kebab (SLOW COOKER METHOD)
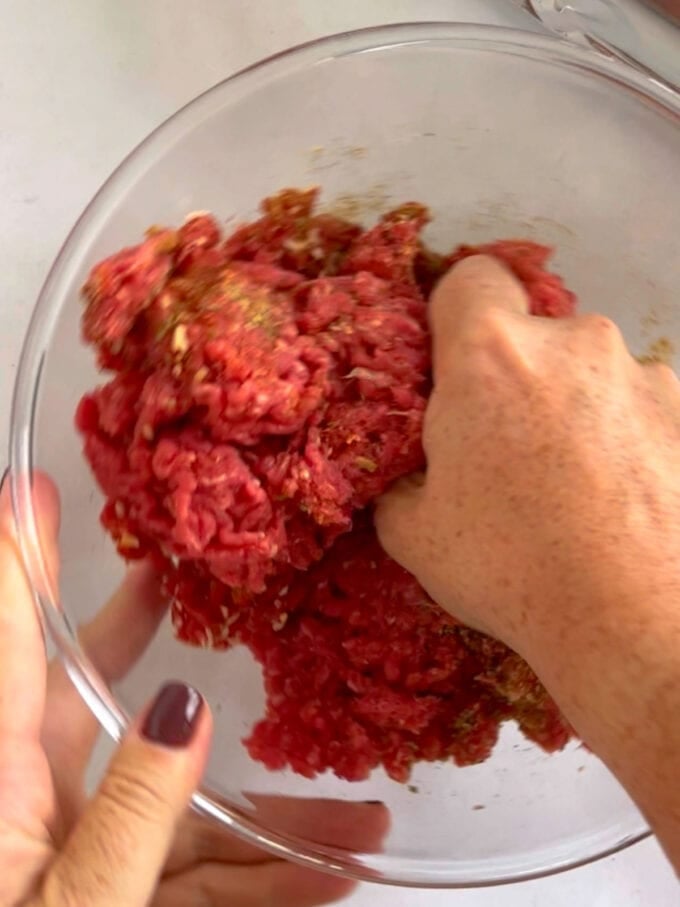
1. Mix the slow cook ingredients (apart from the garlic bulb) together in a bowl with clean hands. You need to knead it with your hands until everything is fully combined and the meat is smooth.
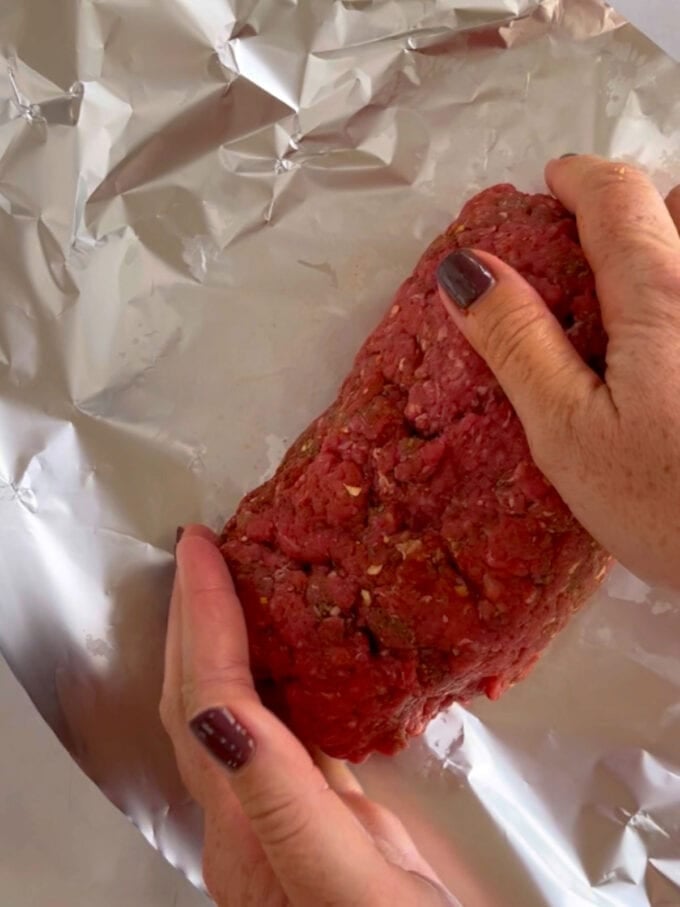
2. Put the meat mixture onto a sheet of tin foil and shape it with your hands into a brick/log type shape.
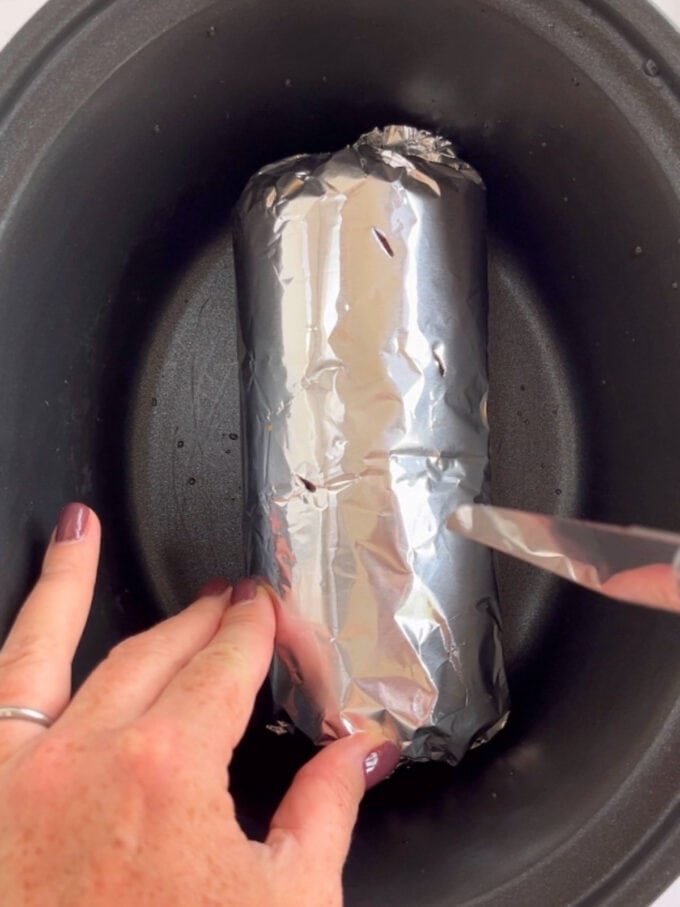
3. Roll it up very tightly, twisting the ends of the tin foil like a sweetie wrapper to secure. Prick the foil. Place it in the bottom of the slow cooker.
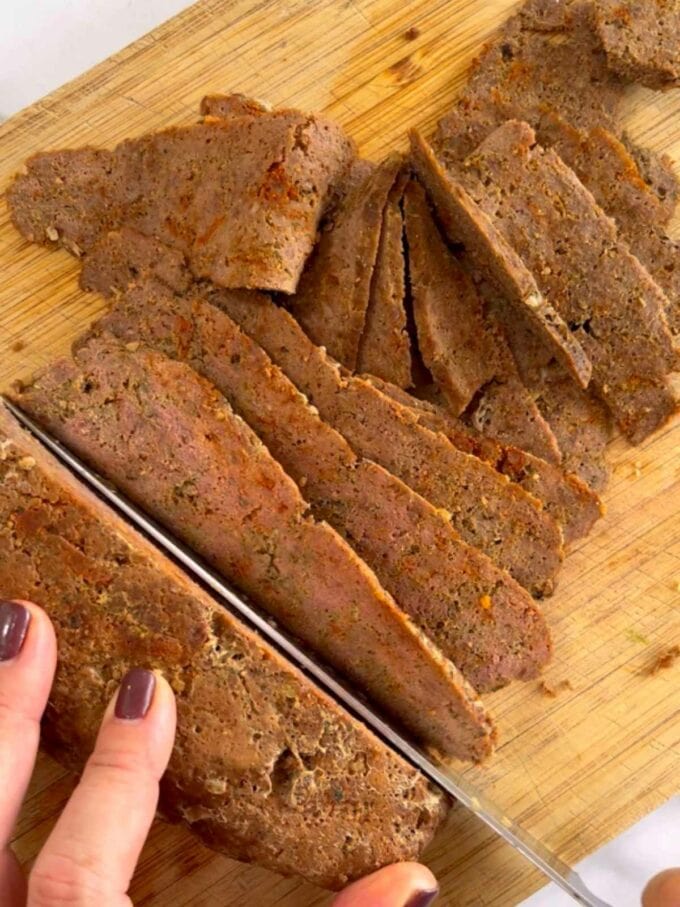
5. Cook as per the recipe. When the meat has cooled slightly, unwrap it and use a very sharp knife to slice very thin strips. Drizzle over the meat juices from the bottom of the slow cooker to serve (this is important as it will be quite dry without this).
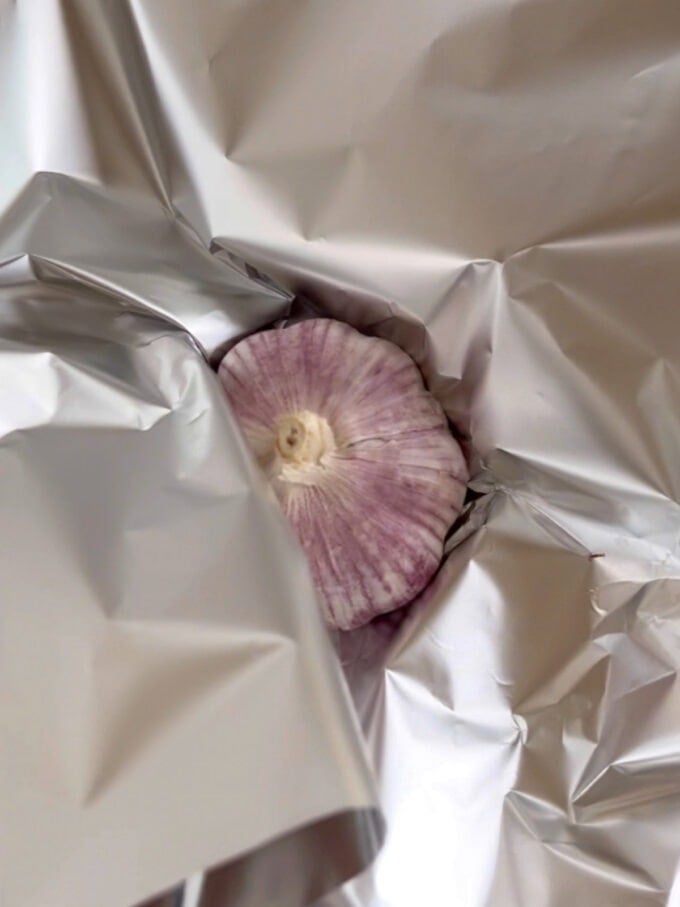
4. Take the unpeeled garlic bulb (yes a whole bulb!) and wrap up in tin foil. Place alongside the meat parcel in the slow cooker.
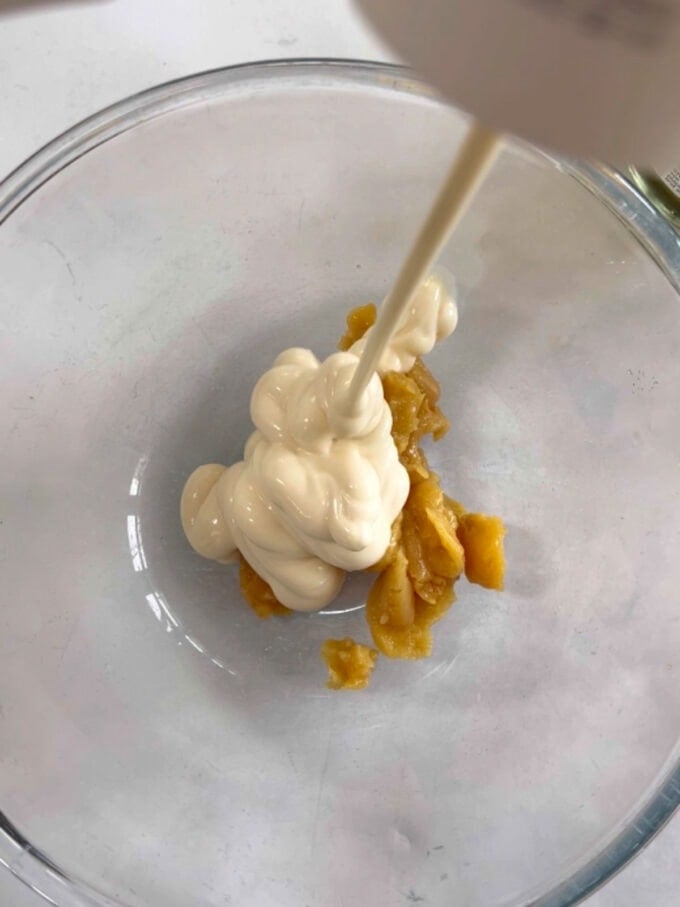
6. Make the garlic sauce by squeezing the cooked very soft garlic from its skin. Just hold the bulb and squeeze from the bottom and it will squish straight out. Add the other sauce ingredients and mix well.
Substitutions
- Mince – I used beef but you could use lamb if you prefer. I find 10% fat works very well, and 5% is also fine but can be quite dry, so be sure to pour over plenty of the cooking liquid if you use this low-fat mince.
Leftovers
In the fridge You can keep this recipe in the fridge for 3 days. Reheat fully in a hot pan with a little oil before serving.
In the freezer This freezes fairly well, Just wait until it’s totally cold and then put into a freezer-proof container and freeze for up to 3 months. Defrost thoroughly before reheating in the microwave or on the hob.
The meat slices do tend to break up a little when reheated but if this doesn’t bother you, go for it.
Top tipS
Meat temperature – It’s really hard to tell if the meat is cooked through as you won’t be looking at the inside (!), so for this recipe I would recommend checking the internal temperature with a meat thermometer. I find this one to be a good option. There are cheaper ones out there but this one tends to be really reliable. It should be 70C (160F) for 2 minutes.
How to slice the meat: It’s important to allow the block of meat to cool for about 15 minutes minutes before slicing it or it will fall apart when it’s cut (although it doesn’t matter so much if you’re hungry and don’t mind it crumbling!) You can reheat the slices of meat afterwards if you want it to be super hot. To do this, put the cooking liquid from the bottom of the slow cooker in a frying pan for 5 minutes or until it’s fully reheated.
More slow cooker beef recipes…
Beef
Beef Goulash
Slow Cooker Beef
Slow Cooker Beef Stew {with Rich Gravy}
Slow Cooker Beef
Chinese Style Beef and Broccoli {Slow Cooker Fakeaways}
Homemade Doner Kebab FAQs
Yes! The texture may be a little different to the slow cooker version, possibly not quite as juicy, but it will still be delicious.
Follow the recipe instructions up until the point you put it in the slow cooker (but add in the garlic to the wrapped meat instead of leaving it out). Place it in a casserole dish with a tight-fitting lid if you can to stop the meat drying out. Put in the oven and cook at 180c for 1 hour.
Make sure it’s cooked through by using a meat thermometer or cutting it open. Follow the recipe from step 6 to finish.
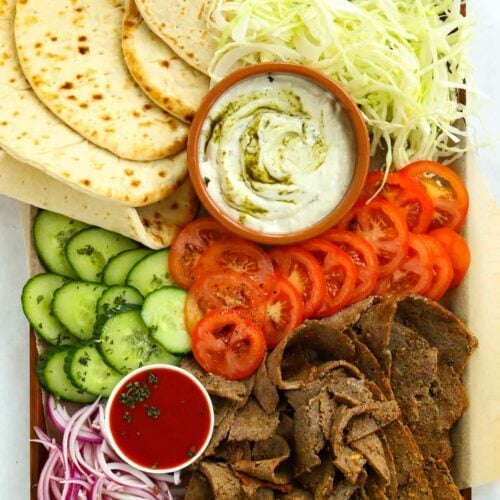
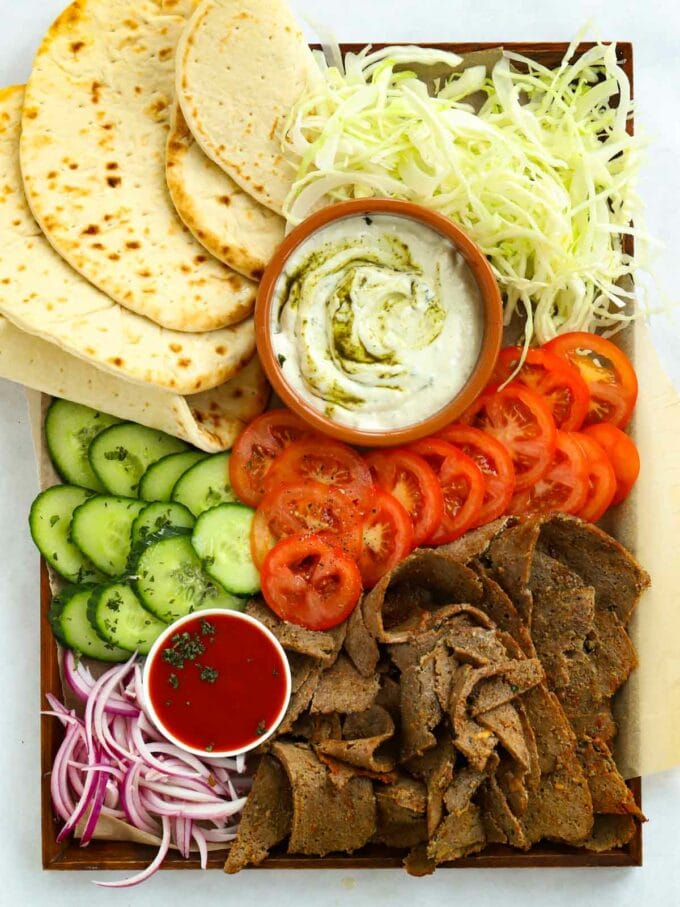
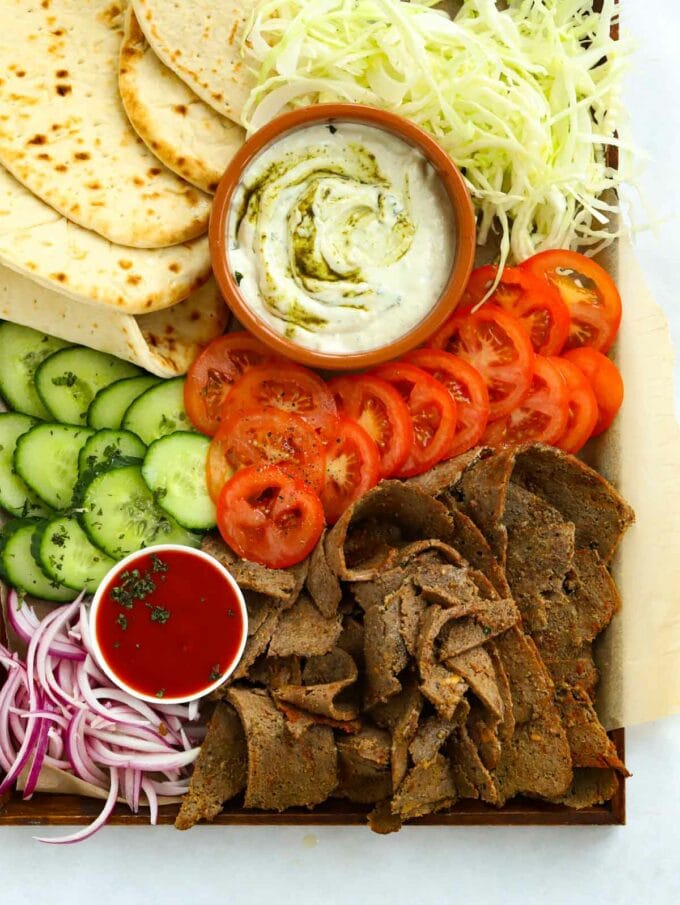
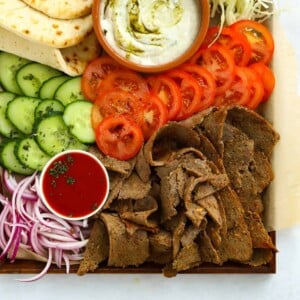
As well as the meat, we serve it into pittas or flatbreads with shredded cabbage, tomatoes, cucumber slices, and chilli peppers (if you dare!) with a drizzle of yoghurt-mayo-mint sauce and chilli sauce.
Yes, it’s made with lean mince and everything else is fairly low fat too.
Doner kebabs are known for being highly calorific but this one isn’t.
My favourite trusty slow cooker is the Morphy Richards Sear & Stew Slow Cooker for gas hobs as you can brown meat beforehand if necessary (I do try and avoid this most of the time though), or if anything needs a quick heat up after slow cooking. It’s also really light which is a bonus.
For induction hobs, I find that the Lakeland Digital 6.5l Slow Cooker is really good too.
Let me know how you got on and what you thought of these recipes. Please rate the recipe using the ⭐️ below.
Also I’d LOVE to see your cooking creations. If you’d like to share yours with me, you can tag me on Instagram (@tamingtwins).
Homemade Doner Kebab {Slow Cooker Recipe}
Ingredients
- 750 g Lean mince
- 3 tsp Onion powder
- 3 tsp Garlic granules
- 3 tsp Ground cumin
- 3 tsp Paprika
- 2 tsp Dried oregano
- 1 tsp Salt
- 1/2 tsp Pepper
- 1 Bulb of garlic
For the sauce:
- 75 g Mayo
- 100 g Greek yoghurt
- 2 tsp Mint sauce
Instructions
- Mix the slow cook ingredients (apart from the garlic bulb) together in a bowl with clean hands. You need to knead it with your hands until everything is fully combined and the meat is smooth.
- Put the meat mixture onto a sheet of tin foil and shape it with your hands into a brick/log type shape. Roll it up very tightly, twisting the ends of the tin foil like a sweetie wrapper to secure.
- Take the unpeeled garlic bulb (yes a whole bulb!) and wrap up in tin foil.
To Cook in the Slow Cooker
- Put the wrapped meat and wrapped garlic in the bottom of the slow cooker. Prick the wrapped meat with a sharp knife a few times.
- Cook for 3-4 hours on HIGH or 5-6 on LOW or until cooked through when you test the internal temperature with a meat thermometer (see notes).
To Cook in the Air Fryer
- Put the wrapped meat and wrapped garlic in the air fryer.
- Cook for 30 minutes at 170C.
- Remove the garlic bulb from the air fryer and set aside to cool. Open up the foil top of the kebab meat to allow the top to brown. (Do this carefully so that the cooking juices don't run out of the bottom of the foil.)
- Cook the meat for a further 15 minutes at 170C or until cooked through when you test the internal temperature with a meat thermometer (see notes).
To Serve
- Let the meat sit to cool for 15-30 minutes (save the juices at the bottom of the slow cooker or foil if cooked in the air fryer).
- When the meat has cooled slightly, unwrap it and use a very sharp knife to slice very thin strips. Drizzle over the meat juices (this is important as it will be quite dry without this).
- Make the garlic sauce by squeeze the cooked, very soft garlic from it's skin. Just hold the bulb and squeeze from the bottom and it will squish straight out. Add the mayo, yoghurt and mint sauce, mix well. Add a splash of water if you'd like it to be more runny.
- Serve the meat as it is with the usual kebab accompaniments and the garlic sauce, OR reheat the meat, with the cooking liquid in a frying pan for a few minutes until hot through (see notes).
Notes
Nutrition
Nutrition information is automatically calculated, so should only be used as an approximation.


We come back to this recipe time and time again! We make it when we want a family treat, we make it when we’re entertaining, and we make it when we don’t have much time in the evening. Absolutely delicious, and total crowd pleaser! Have forwarded the recipe to countless friends, absolutely love it!
This recipe is definitely a keeper in our house. I have used lamb and it was delicious.