This post may contain affiliate links.

Make these retro homemade treats with the kids to celebrate the season. Easter Nests are made with shredded wheat covered in chocolate with mini eggs on top. They’re super easy, delicious and fun.

How cute are these chocolatey homemade Easter Nests?!
If there’s one treat I used to make at this time of year when the kids were little, it was always this one.
Why? It’s super easy and quick, making it kid-friendly for a baking activity, even if time is in short supply (they are even easier than Easter Rocky Road, if you can believe that).
They also loved giving these nests to their friends. Filled with chocolate and bursting with spring colours, what more could you want in an Easter treat?!
Why you’ll love this Easy Easter Nests recipe
⭐️ Only 5 simple ingredients
⭐️ Perfect to (no) bake with kids
⭐️ Cute and fun Easter treat

Sarah’s Notes
This simple recipe is along the same lines as my Rice Crispy Cakes – a total retro British classic that involves breakfast cereal, a quick chocolate melt, a bit of a stir, then set in the fridge.
I’ve tried this recipe with and without butter and golden syrup and I’d say it’s a far superior flavour and texture with both of these ingredients added.
As well as adding flavour, creaminess and sweetness, they also help to bind the chocolate and shredded wheat beautifully, so they don’t fall apart in their cases or when eating (as long as you’ve left them to set for enough time, that is!)
Chocolate Easter Nests Ingredients
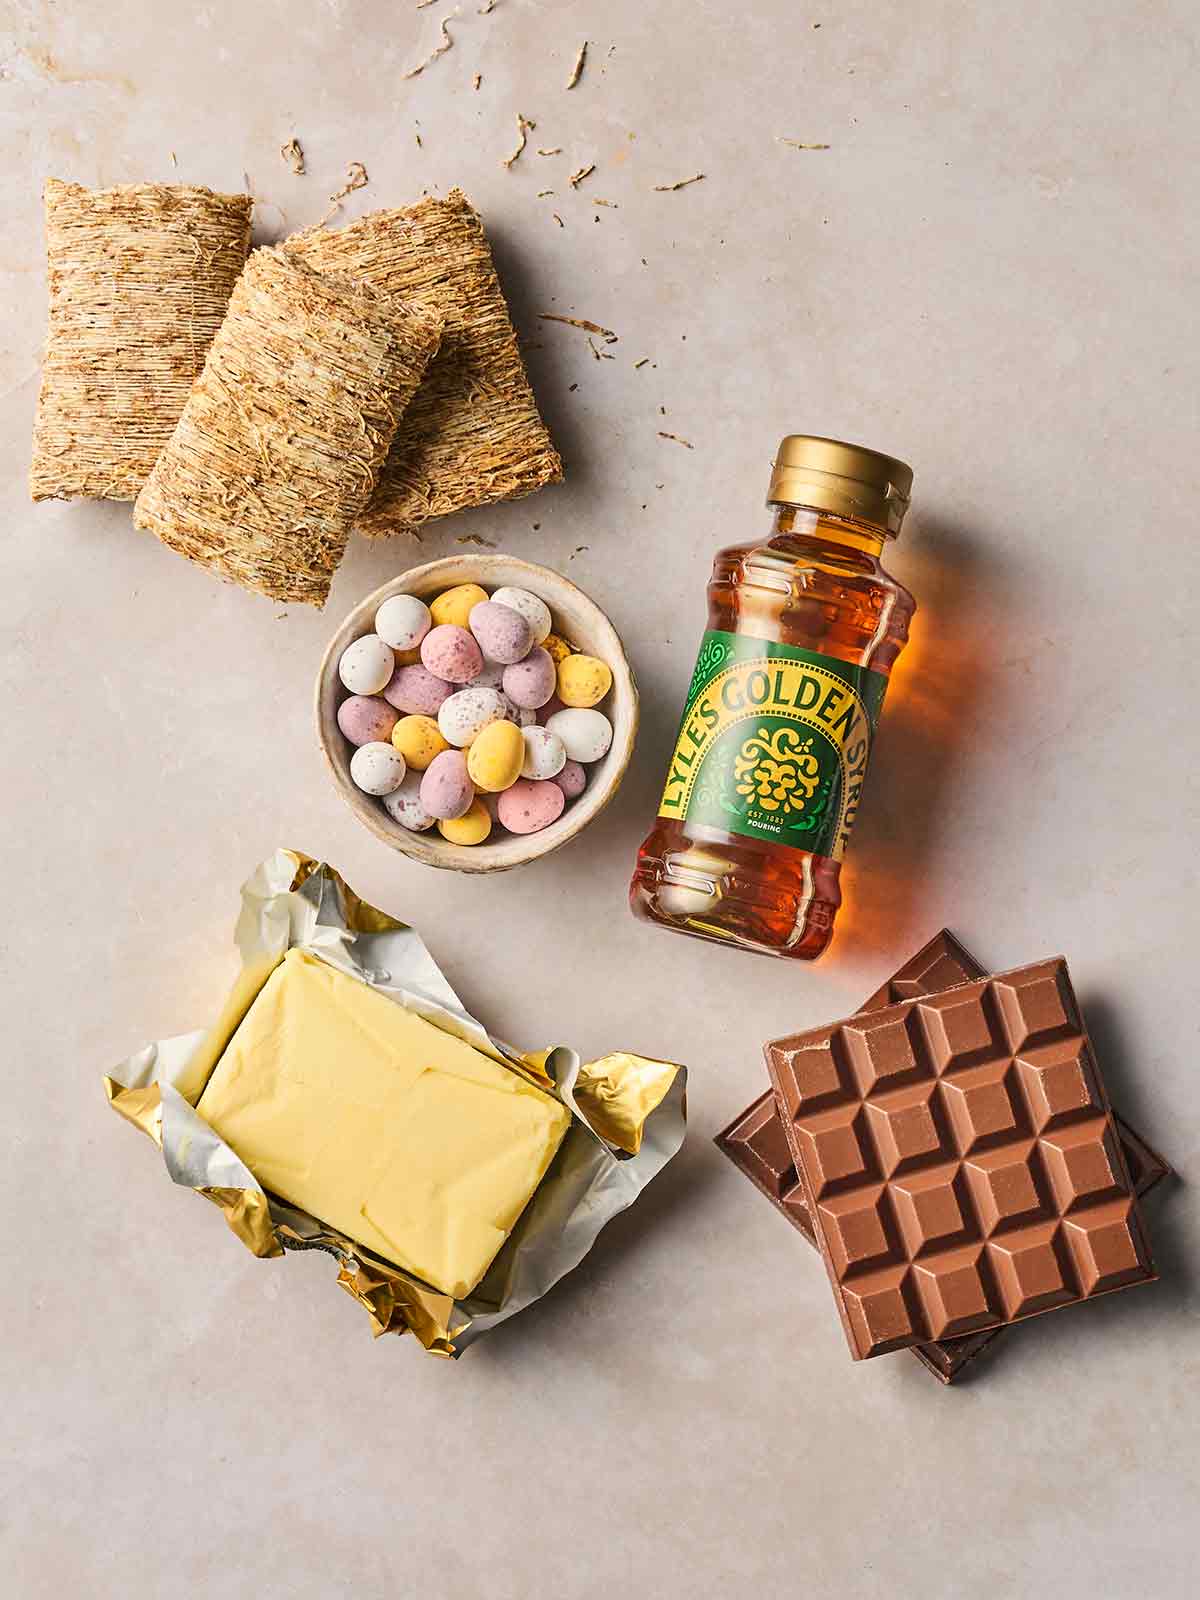
- Shredded wheat – I use about 8 large shredded wheats to make 12 nests, which is roughly 180g. This is the original unflavoured type, but if you can’t get hold of this you could use bitesized, using the equivalent weight. Don’t swap for the flavoured variety or it’ll be too sweet.
- Golden syrup – Just a tablespoon.
- Salted butter – This adds a delicious saltiness to the cakes but you can use unsalted if you prefer, or you could even add a little extra pinch for a slightly more grown up taste!
- Chocolate – You can use whatever kind you prefer in chunks or chips to melt down. I use a mixture of milk and dark chocolate, using Callebaut chips.
- Cadbury’s Mini Eggs – You’ll need about 36 for this recipe (approximately 100g).
How to make Easter Nests

1. Crush the shredded wheat with your hands in a bowl.
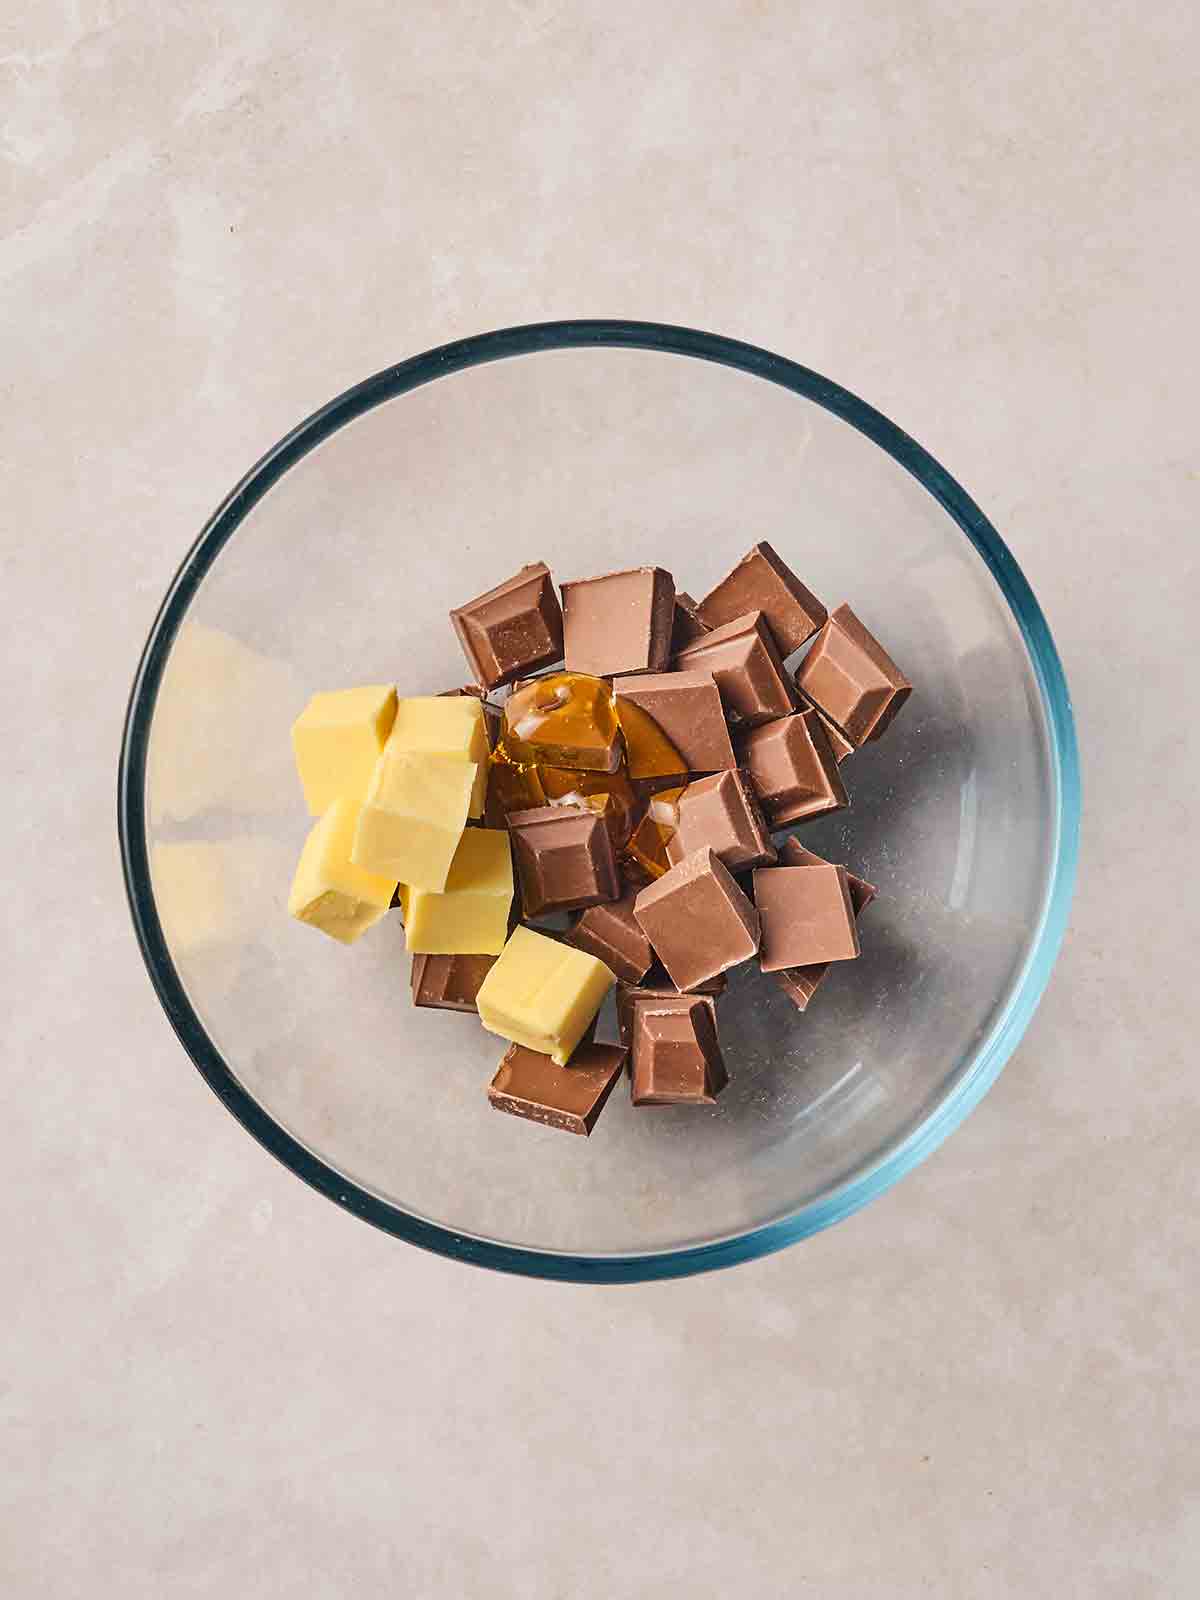
2. Carefully melt the golden syrup, butter and chocolate in a heatproof bowl, as per the full recipe below.
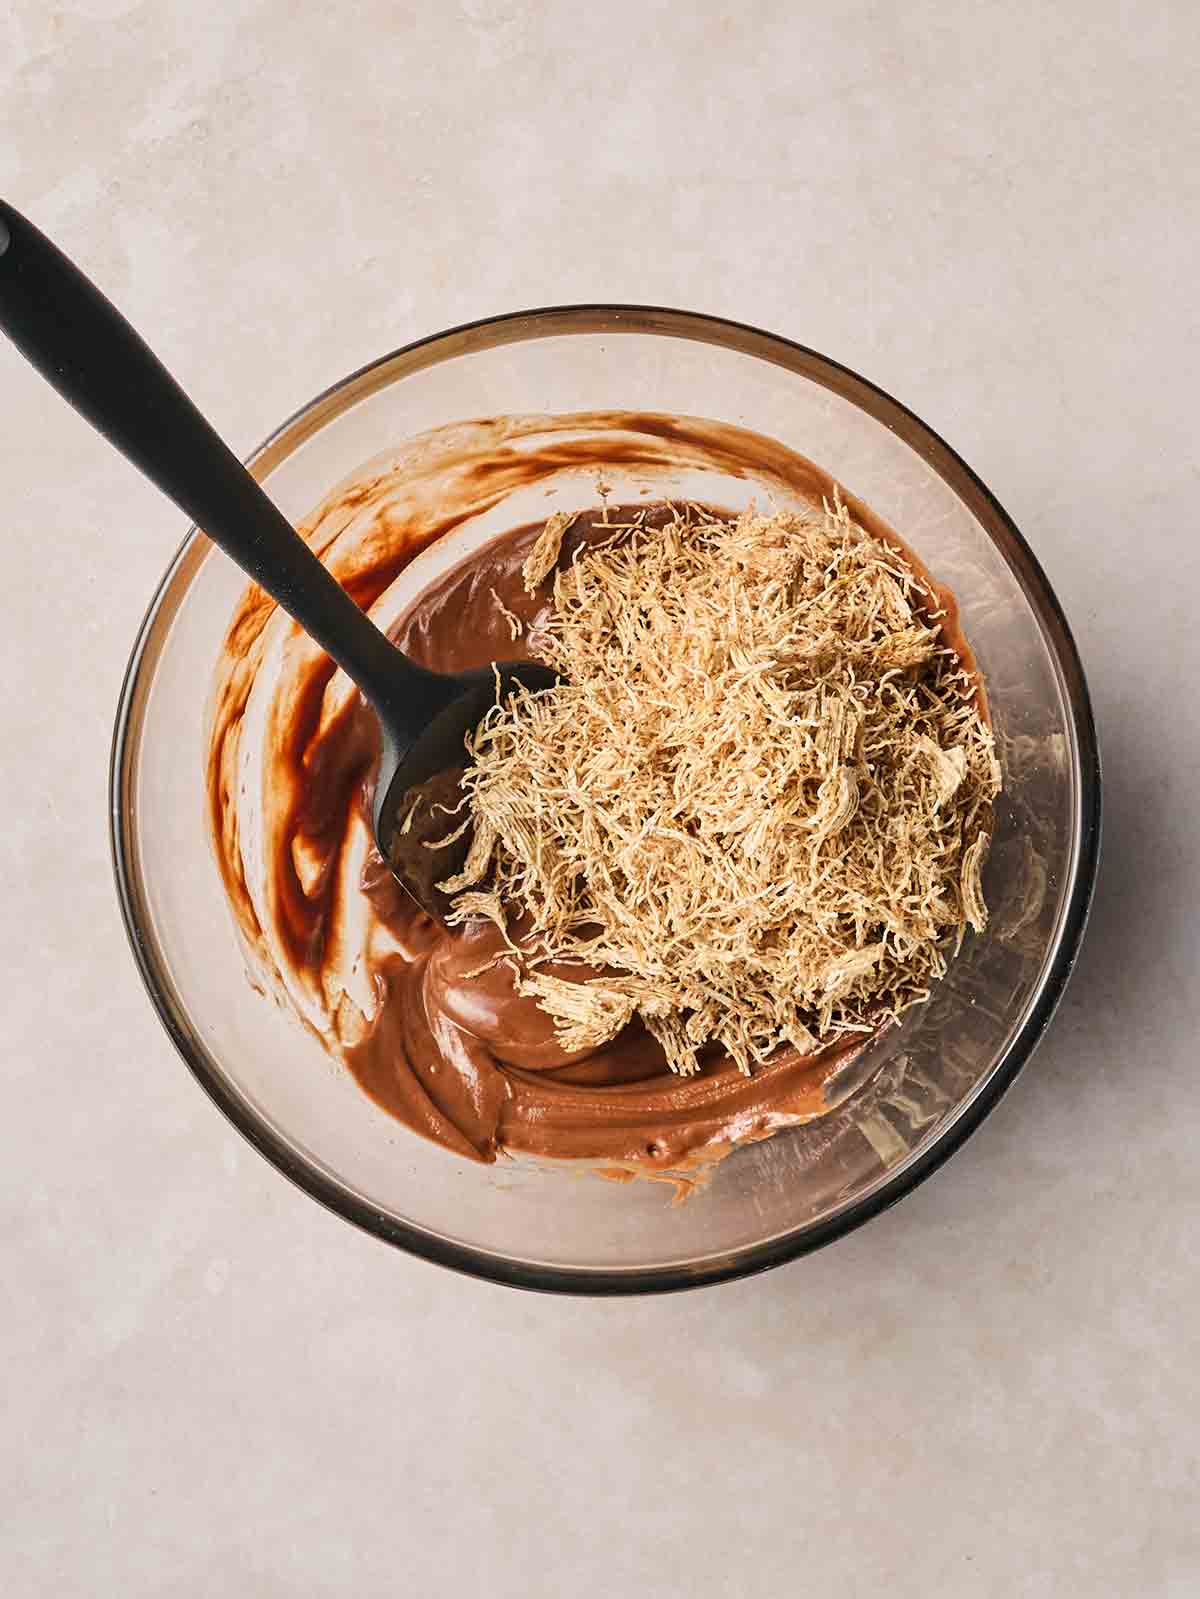
3. Stir in the crushed shredded wheat until well coated.
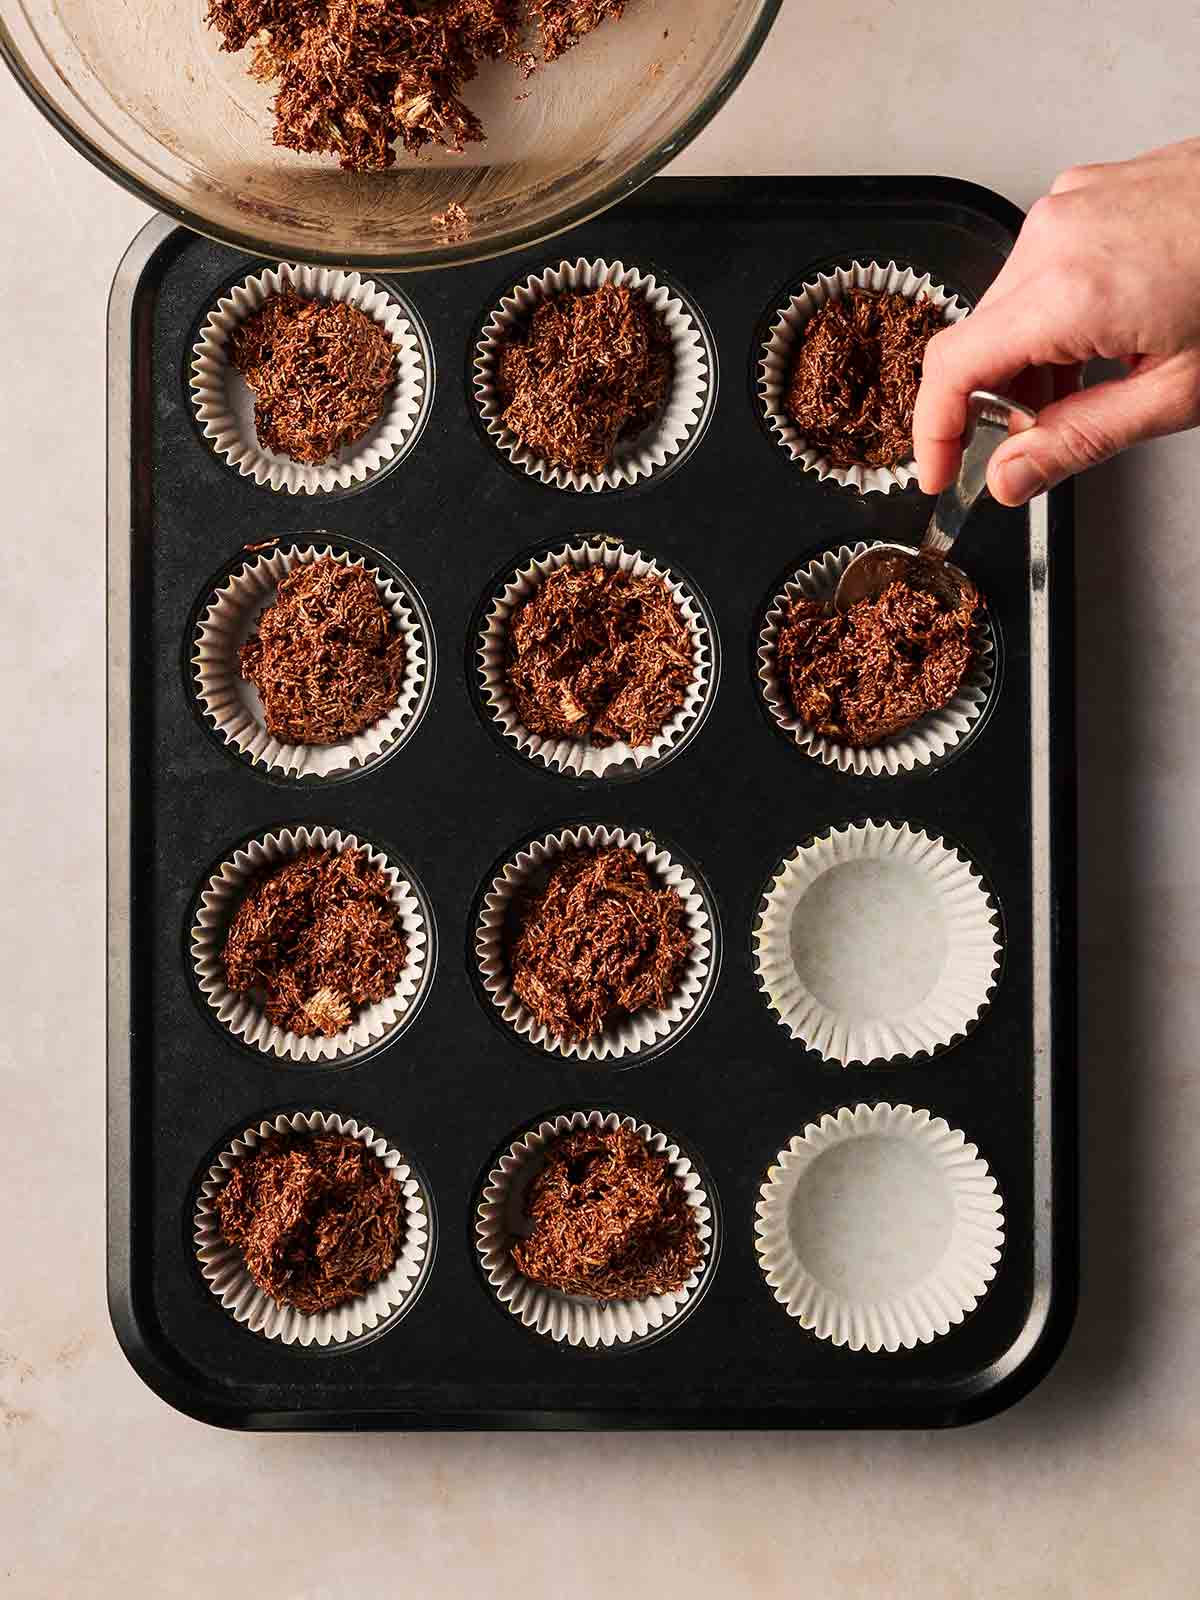
4. Split the mixture between 12 cupcake cases, gently press three mini eggs into each and set in the fridge.
Storing
The cakes will keep in an airtight container for up to 5 days at room temperature. (If they last that long!)
I wouldn’t recommend freezing the nests.
The best way to melt chocolate
The way I do it is put everything in a microwavable bowl and blast it for 30 seconds at a time, stirring in between. Just be very careful not to overdo it or it will burn. This is the quickest method, by far.
Alternatively, put it in a heatproof bowl and melt it over a pan with a few centimetres of simmering water in it. Keep it on a low heat and stir frequently so it doesn’t split.
More Easter recipes with mini eggs…

Easter Ideas
Mini Egg Cheesecake
Sweet Things
Mini Egg Fudge {Easy No Bake Recipe}
Easter Ideas
Mini Egg CHOCOLATE Pudding {Slow Cooker Recipe}

Easter Ideas
Mini Egg Cookies
FAQs
At least an hour, but a little while longer will ensure they’re really solid.
The amount of mixture in this recipe makes 12 nicely sized nests in the cupcake cases, but you could use muffin cases if you wanted them even bigger, it would just make a few less. Or you could adjust your ingredients measurements if you want to make more.
Yes! They won’t have the same bird’s nest effect as the shredded wheat, but they’ll still be delicious.
Let me know how you got on and what you thought of these recipes. Please rate the recipe using the ⭐️ below.
Also I’d LOVE to see your cooking creations. If you’d like to share yours with me, you can tag me on Instagram (@tamingtwins).

Easter Nests {Easy No Bake Recipe}
Ingredients
- 180 g (6 oz) Shredded wheat, About 8 large shredded wheat
- 1 tbsp Golden syrup
- 50 g (2 oz) Salted butter
- 200 g (7 oz) Chocolate, In chunks or chips
- 100 g (4 oz) Mini Eggs, About 36 for 12 nests
Instructions
- Crush the shredded wheat with your hands in a large bowl.
- Melt everything together: Place the golden syrup, butter and chocolate. Either blast it for 30 seconds at a time in the microwave, stirring in between, being careful not to let it burn. OR put it in a heatproof bowl and melt it over a pan with a few centimetres of simmering water in it. Keep it on a low heat and stir frequently so it doesn’t split.
- Mix: When everything has melted together, stir in the crushed shredded wheat until well coated.
- Assemble: Split the mixture between 12 cupcake cases, gently press three mini eggs into each and place in the fridge for an hour or so until set.
Did you make this recipe? Click here to let us know how it went and give it a ⭐️ rating! Your feedback helps us to make more recipes you really want.
Notes
Nutrition
Nutrition information is automatically calculated, so should only be used as an approximation. Nutritional values are per portion unless otherwise stated.
This post was originally published on February 5, 2026 and updated later to make improvements.